Payments + Plans
StartKit.AI uses either Stripe or Lemon Squeezy for your payment provider and we have setup instructions for both.
Stripe
- Make sure you have your Stripe Account set up for receiving payments.
- Turn on Stripe’s Test Mode
- Create a new product and copy the
Price ID

- Paste the Price ID into the
config/plans.ymlfile for the respective plan, in theprice_idfield.
Stripe Webhooks
Webhooks are how Stripe lets you know that you’ve received a payment. In the case of StartKit.AI, we have an API route that you can provide to Stripe which will provision a users’ account after they pay using the limits set in the plans.yml file.
- Go to Developers -> API Keys and copy the Secret key, enter it into your
.env
STRIPE_API_KEY=- Go to Developers -> Webhooks and add the endpoint for
https://<your_startkit_url>/api/webhooks/payments(you can change this url later if you don’t know your domain yet).
You should listen to the following events at a minimum (you can add more later if you want):
checkout.session.completedcustomer.subscription.deletedcustomer.subscription.updated
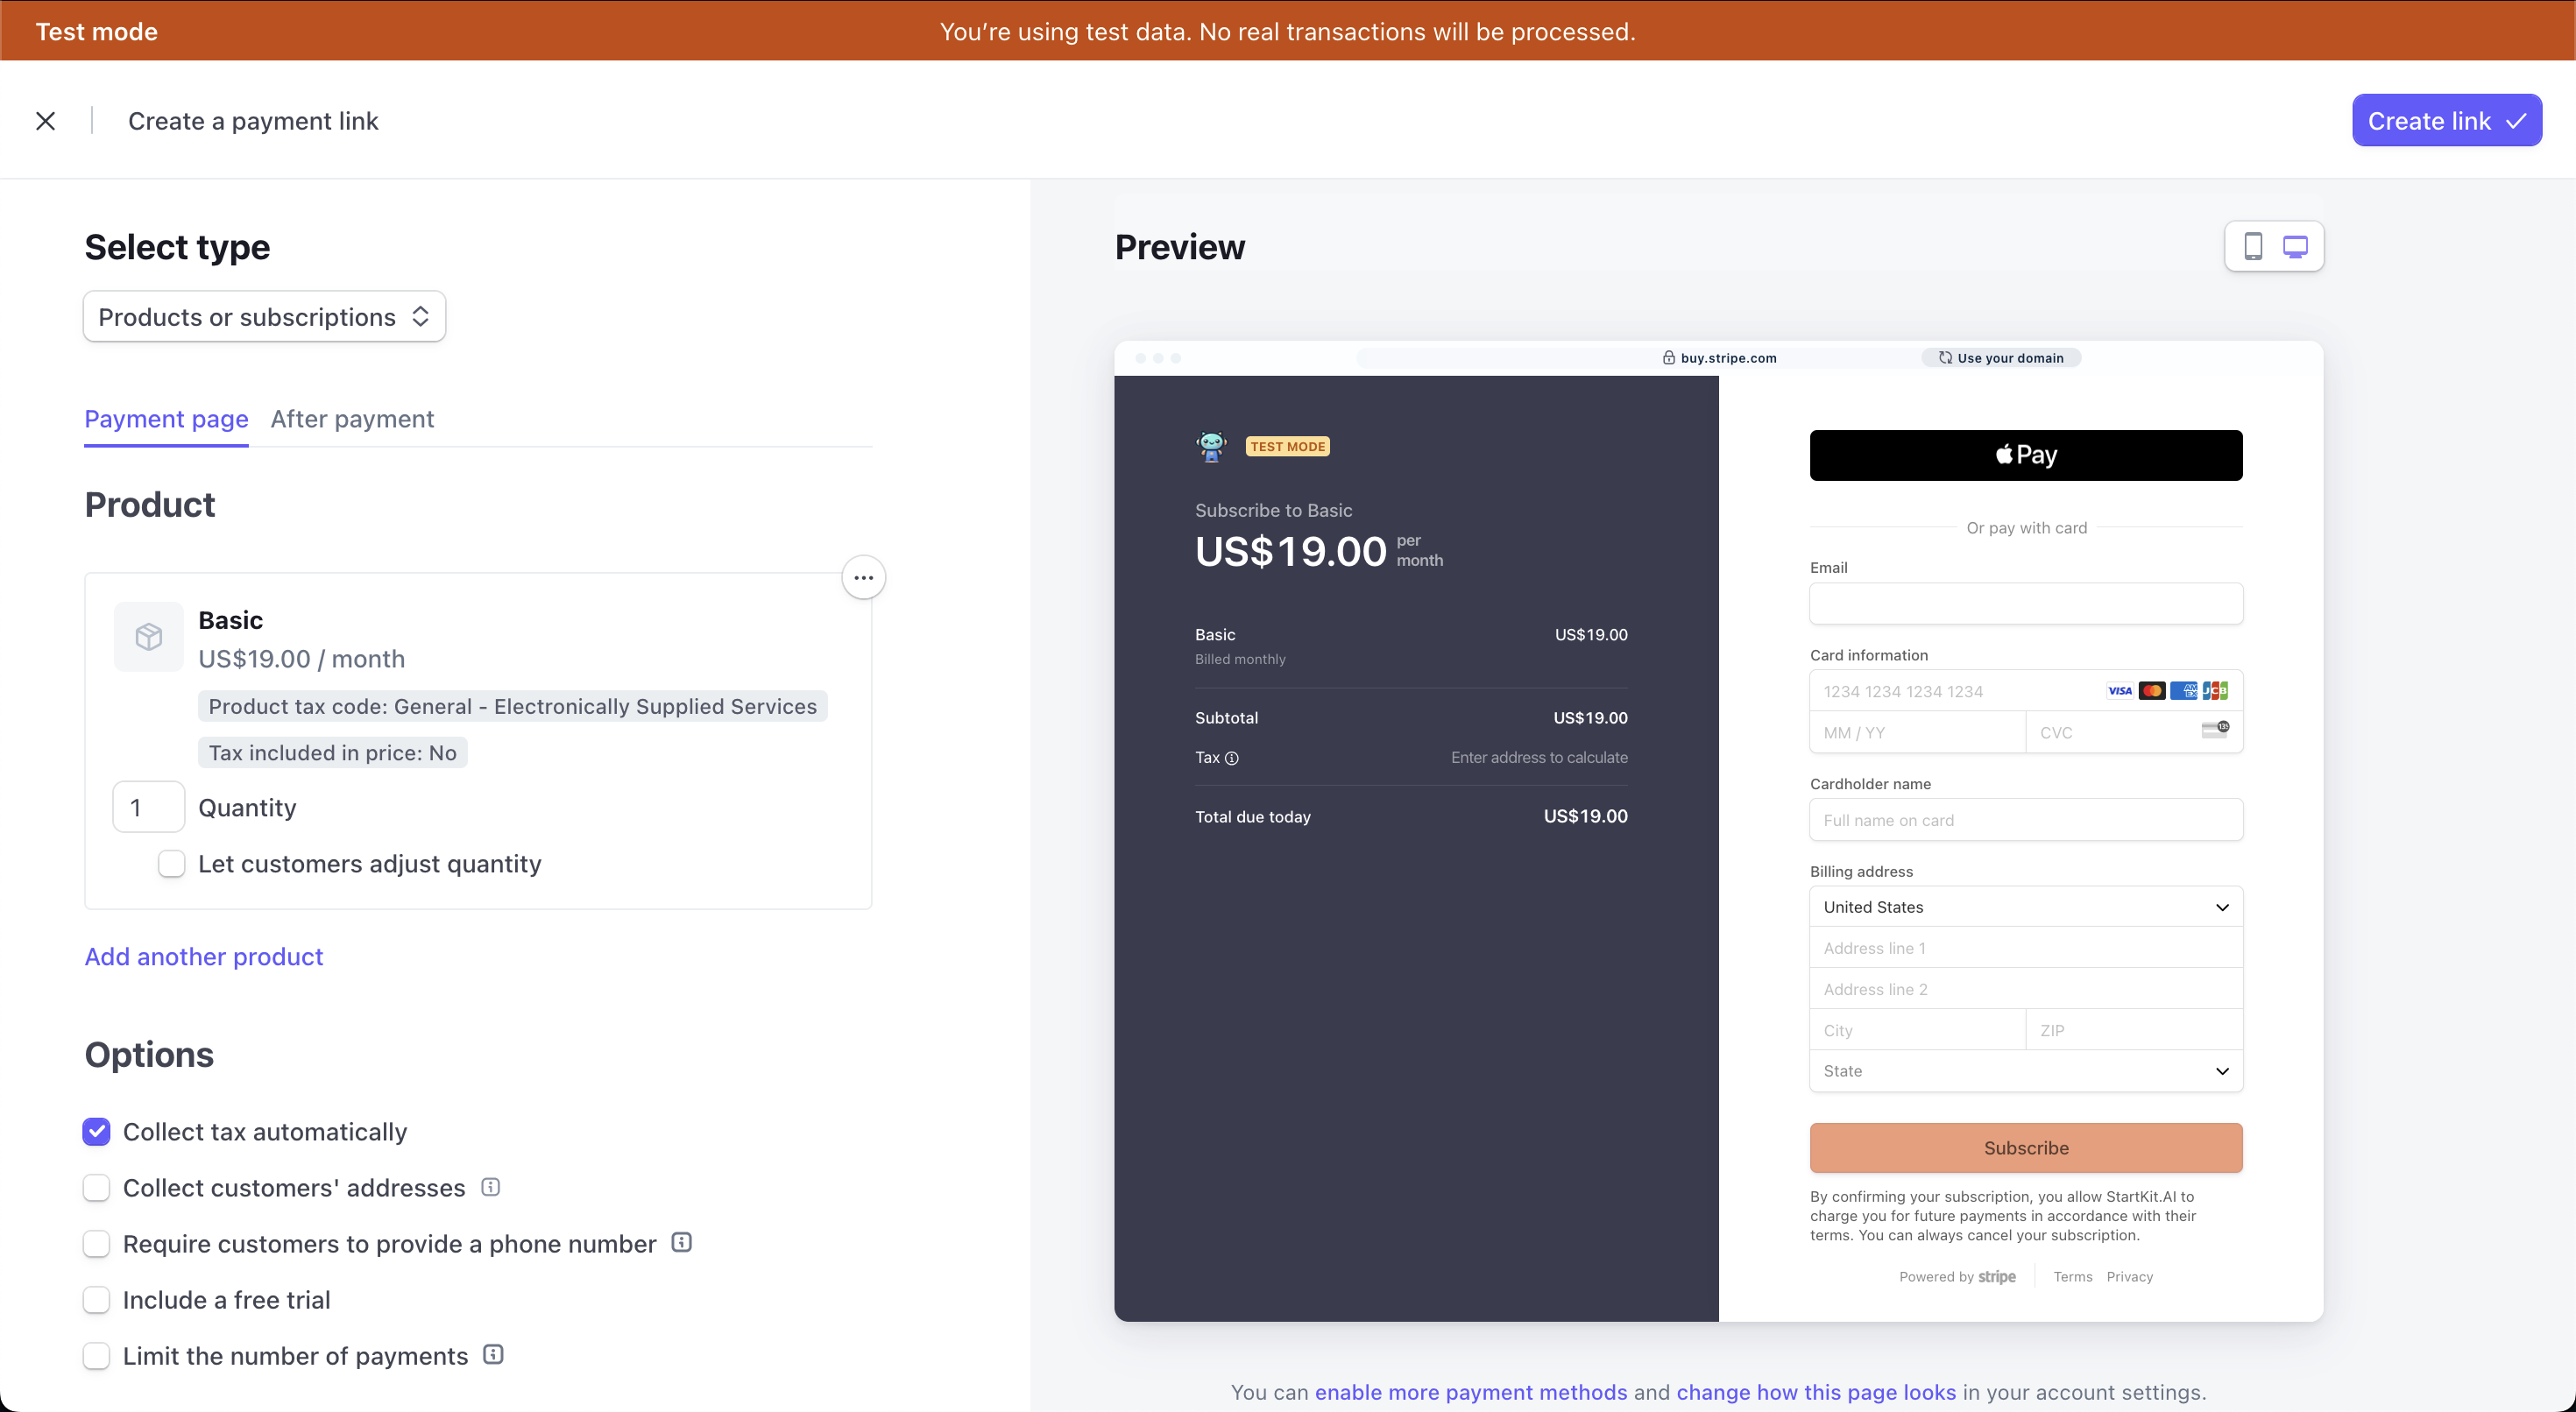
Payment Links
Payment links are the quickest way to direct a customer to a checkout page with Stripe.
- Go to Payment Links
- Create a payment link for each of your products.
- Click the After payment tab, select Don’t show confirmation page, and set the checkout to redirect back to StartKit: https://localhost:1337/app/settings/plan
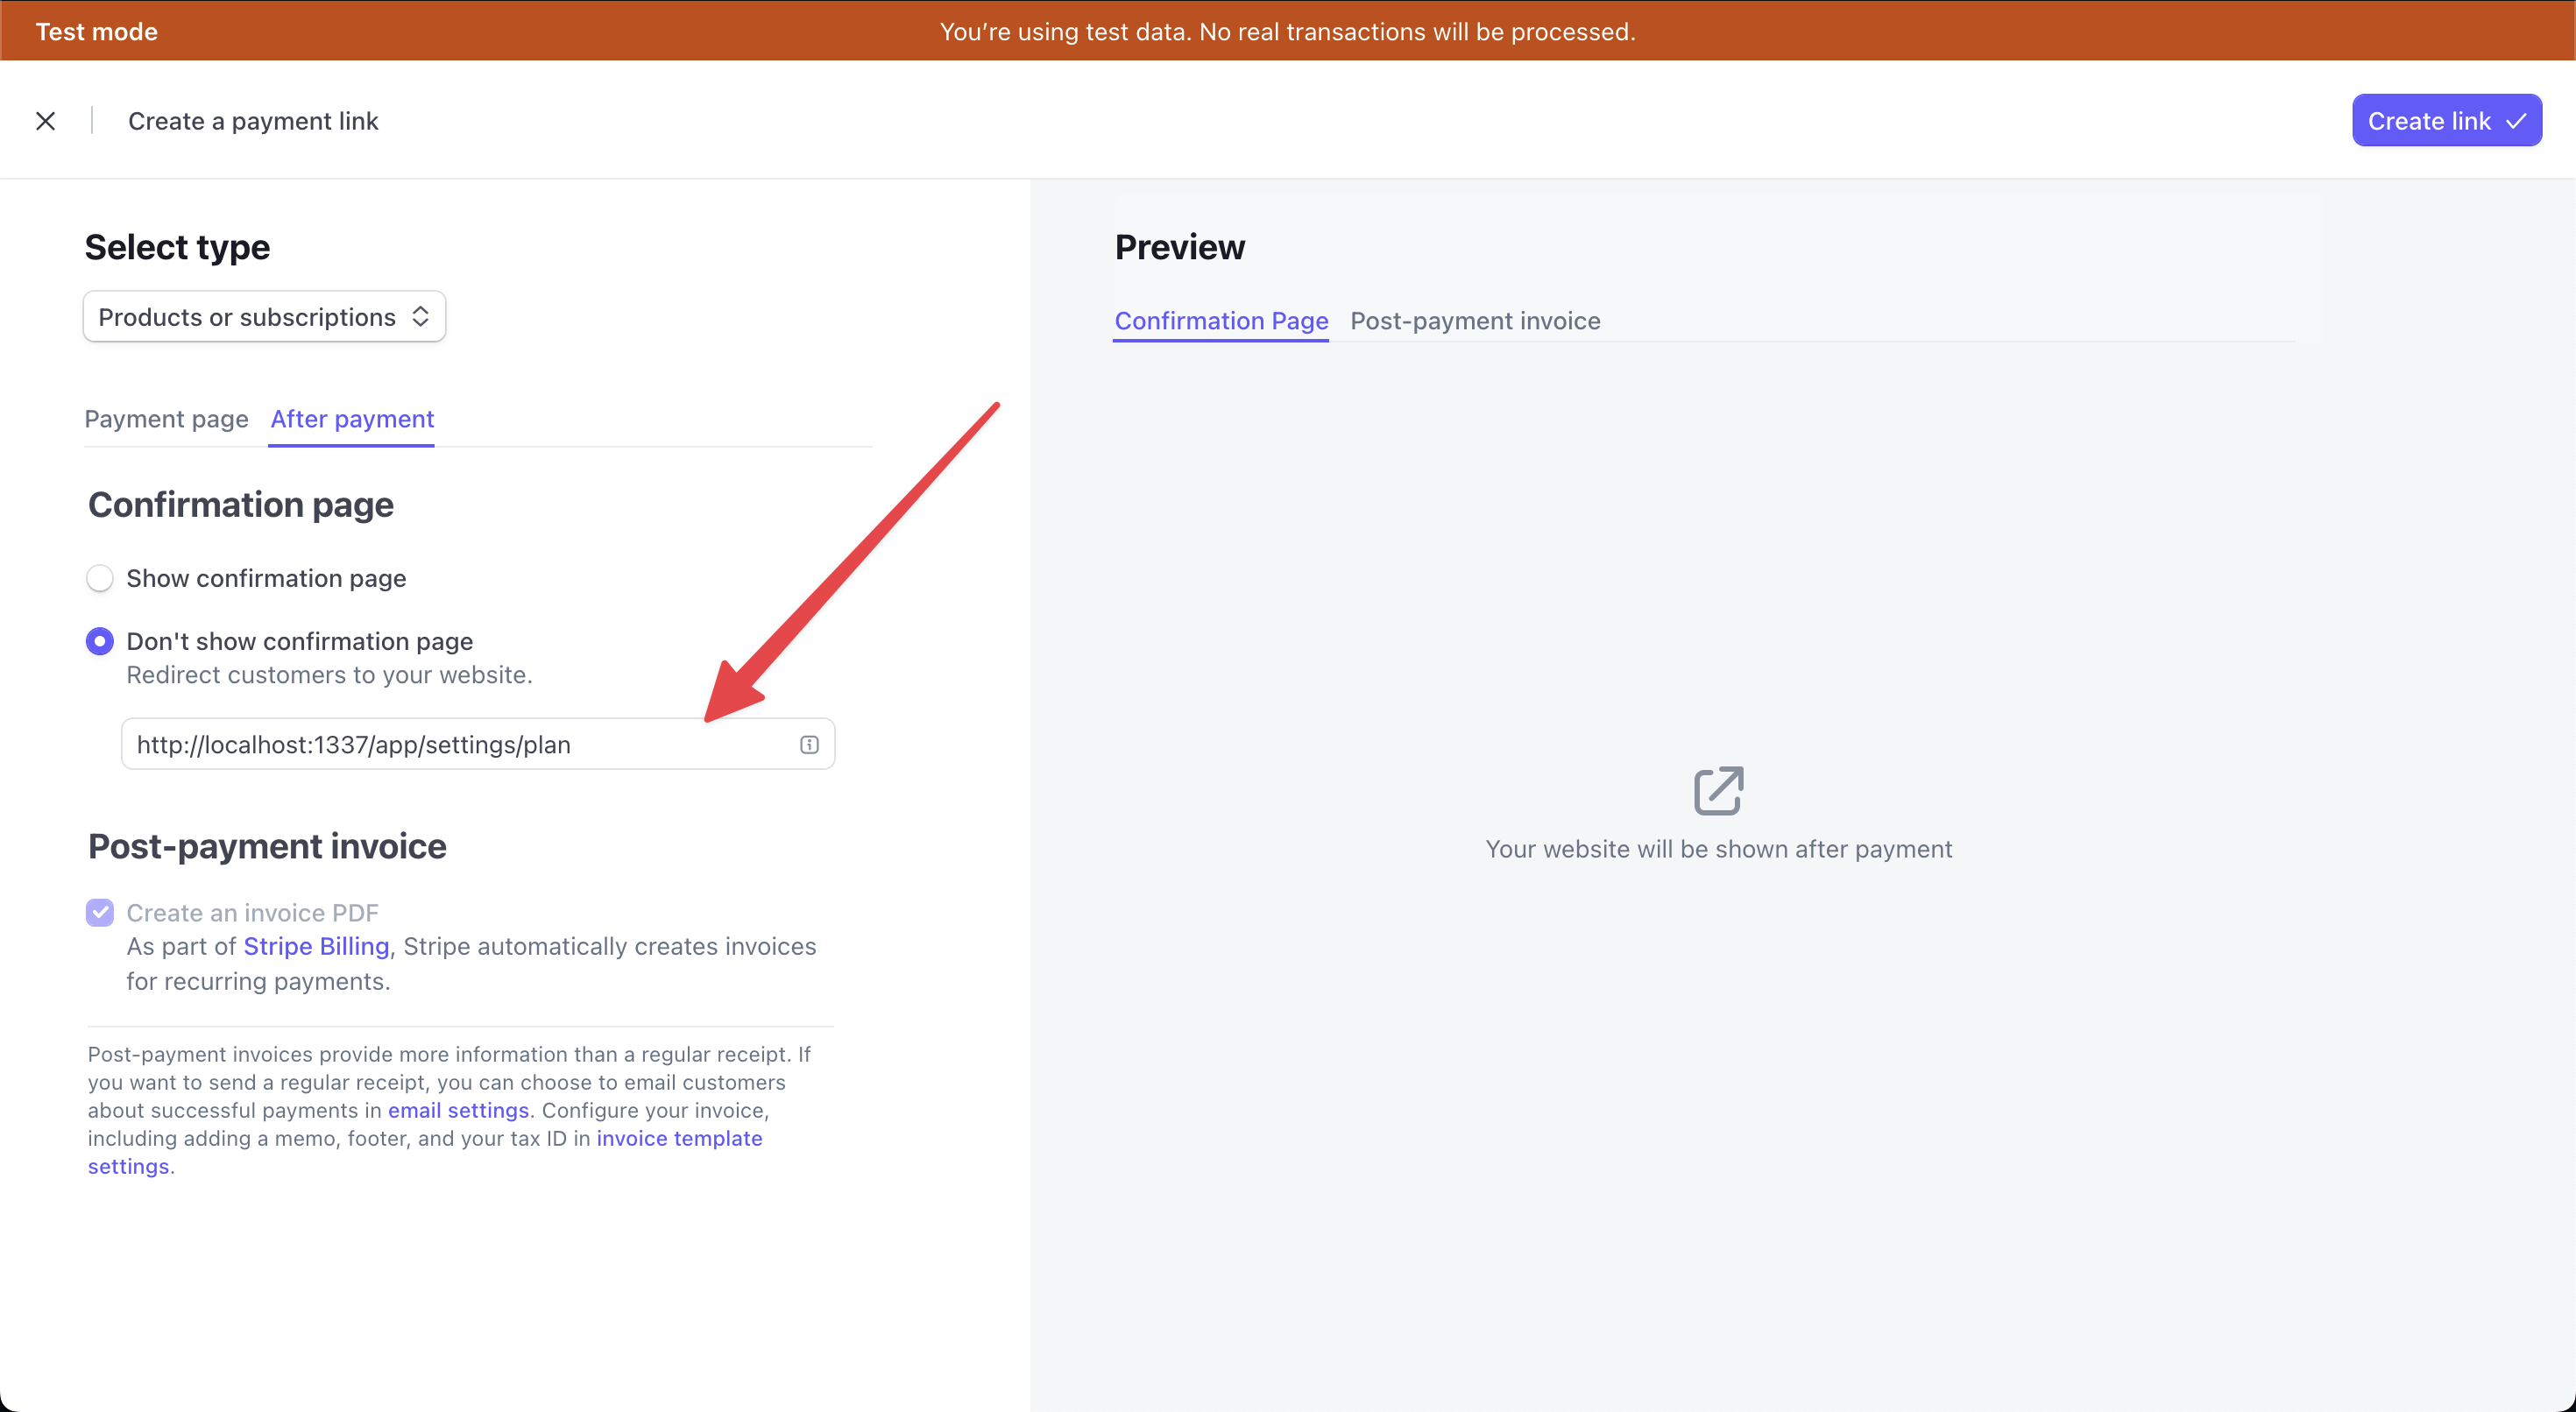
- Click Create link in the top right and paste the payment link into the
config/plans.ymlfile for the respective plan, in thecheckout_urlfield.
checkout_url: https://buy.stripe.com/test_3cs4jVgd1euY5y08wACustomer Portal
The Stripe customer portal is the best way to let customers manage their subscription and billing details.
- Go to Customer Portal
- Activate your test link
- Paste the link into your
.envas theVITE_CUSTOMER_PORTAL_URL
VITE_CUSTOMER_PORTAL_URL=
Testing locally in development
It’s possible to test the Stripe webhooks locally by using the Stripe CLI.
- Install Stripe CLI (more install instructions here).
brew install stripe/stripe-cli/stripe- In the Stripe dashboard go to Developers -> Webhooks -> Add an endpoint -> Test in a local environment.
- After logging into the Stripe CLI run this command to forward Stripe webhook events to your local server:
stripe listen --forward-to localhost:1337/api/webhooks/payments- Copy the signing secret from the CLI and enter it into your
.env
STRIPE_WEBHOOK_SECRET=Now you can either trigger events manually with the CLI:
stripe trigger payment_intent.succeededOr you can test purchasing a plan using Stripe test payment methods.
In production
- In test mode of the Stripe Dashboard, copy your products to live mode and copy the Price ID into your
plans.yamlfile (see the Stripe Setup section above). - Copy your payment links to live mode and edit the After payment url redirect for each one to your live url
https://<your_startkit_url>/app/settings/plan. - Turn off test mode in your Stripe dashboard.
- In Settings -> Billing -> Customer portal activate the live link and add it to
VITE_CUSTOMER_PORTAL_URLin your producrtion environment variables. - In Developers -> API Keys copy the Secret key and add it to
STRIPE_API_KEY=in your production environment variables. - In Developers -> Webhooks create the live webhook at
https://<your_startkit_url>/api/webhooks/paymentsif you haven’t already. Click the webhook, reveal the live signing secret, and enter inSTRIPE_WEBHOOK_SECRET=in your production environment variables.
STRIPE_API_KEY=STRIPE_WEBHOOK_SECRET=Stripe Webhook Events
StartKit.AI implements the following Stripe webhooks and actions them:
switch (type) { case 'checkout.session.completed': { // ✨ The user completed the checkout and paid successfully // Here we provision access to your product based on the Stript product ID handleCheckoutCompleted(data.object); break; } case 'checkout.session.expired': { // ⏲️ The user opened the checkout but did not complete the payment // (optional): Send a cart expired email break; } case 'customer.subscription.updated': { // 🔀 The user changed their subscription. // If the plan was upgraded or downgraded then we update the limits // // If the plan was canceled we make a note of this on the user // as this event is received before the end of the cencellation // period. A 'customer.subscription.deleted' event will be fired // when the billing period is finished // This means you can handle when an account is coming up for cancellation // // If the plan was reactivated after being cancelled then we make a note // of this on the user and ignore the subscription cancelled event from before. handleSubscriptionUpdated(data.object, data.previous_attributes); break; } case 'customer.subscription.deleted': { // ❌ The user deleted their subscription // We remove the users' access to the product handleSubscriptionDeleted(data.object); break; }}Feel free to add any other webhook actions that you need into this switch statement.
Lemon Squeezy
- Make sure you have your Lemon Squeezy Account set up for receiving payments.
- Turn on Lemon Squeezy’s test mode (this is turned on by default if you didn’t set your store live yet).
- Create a new product and copy the
Product ID.
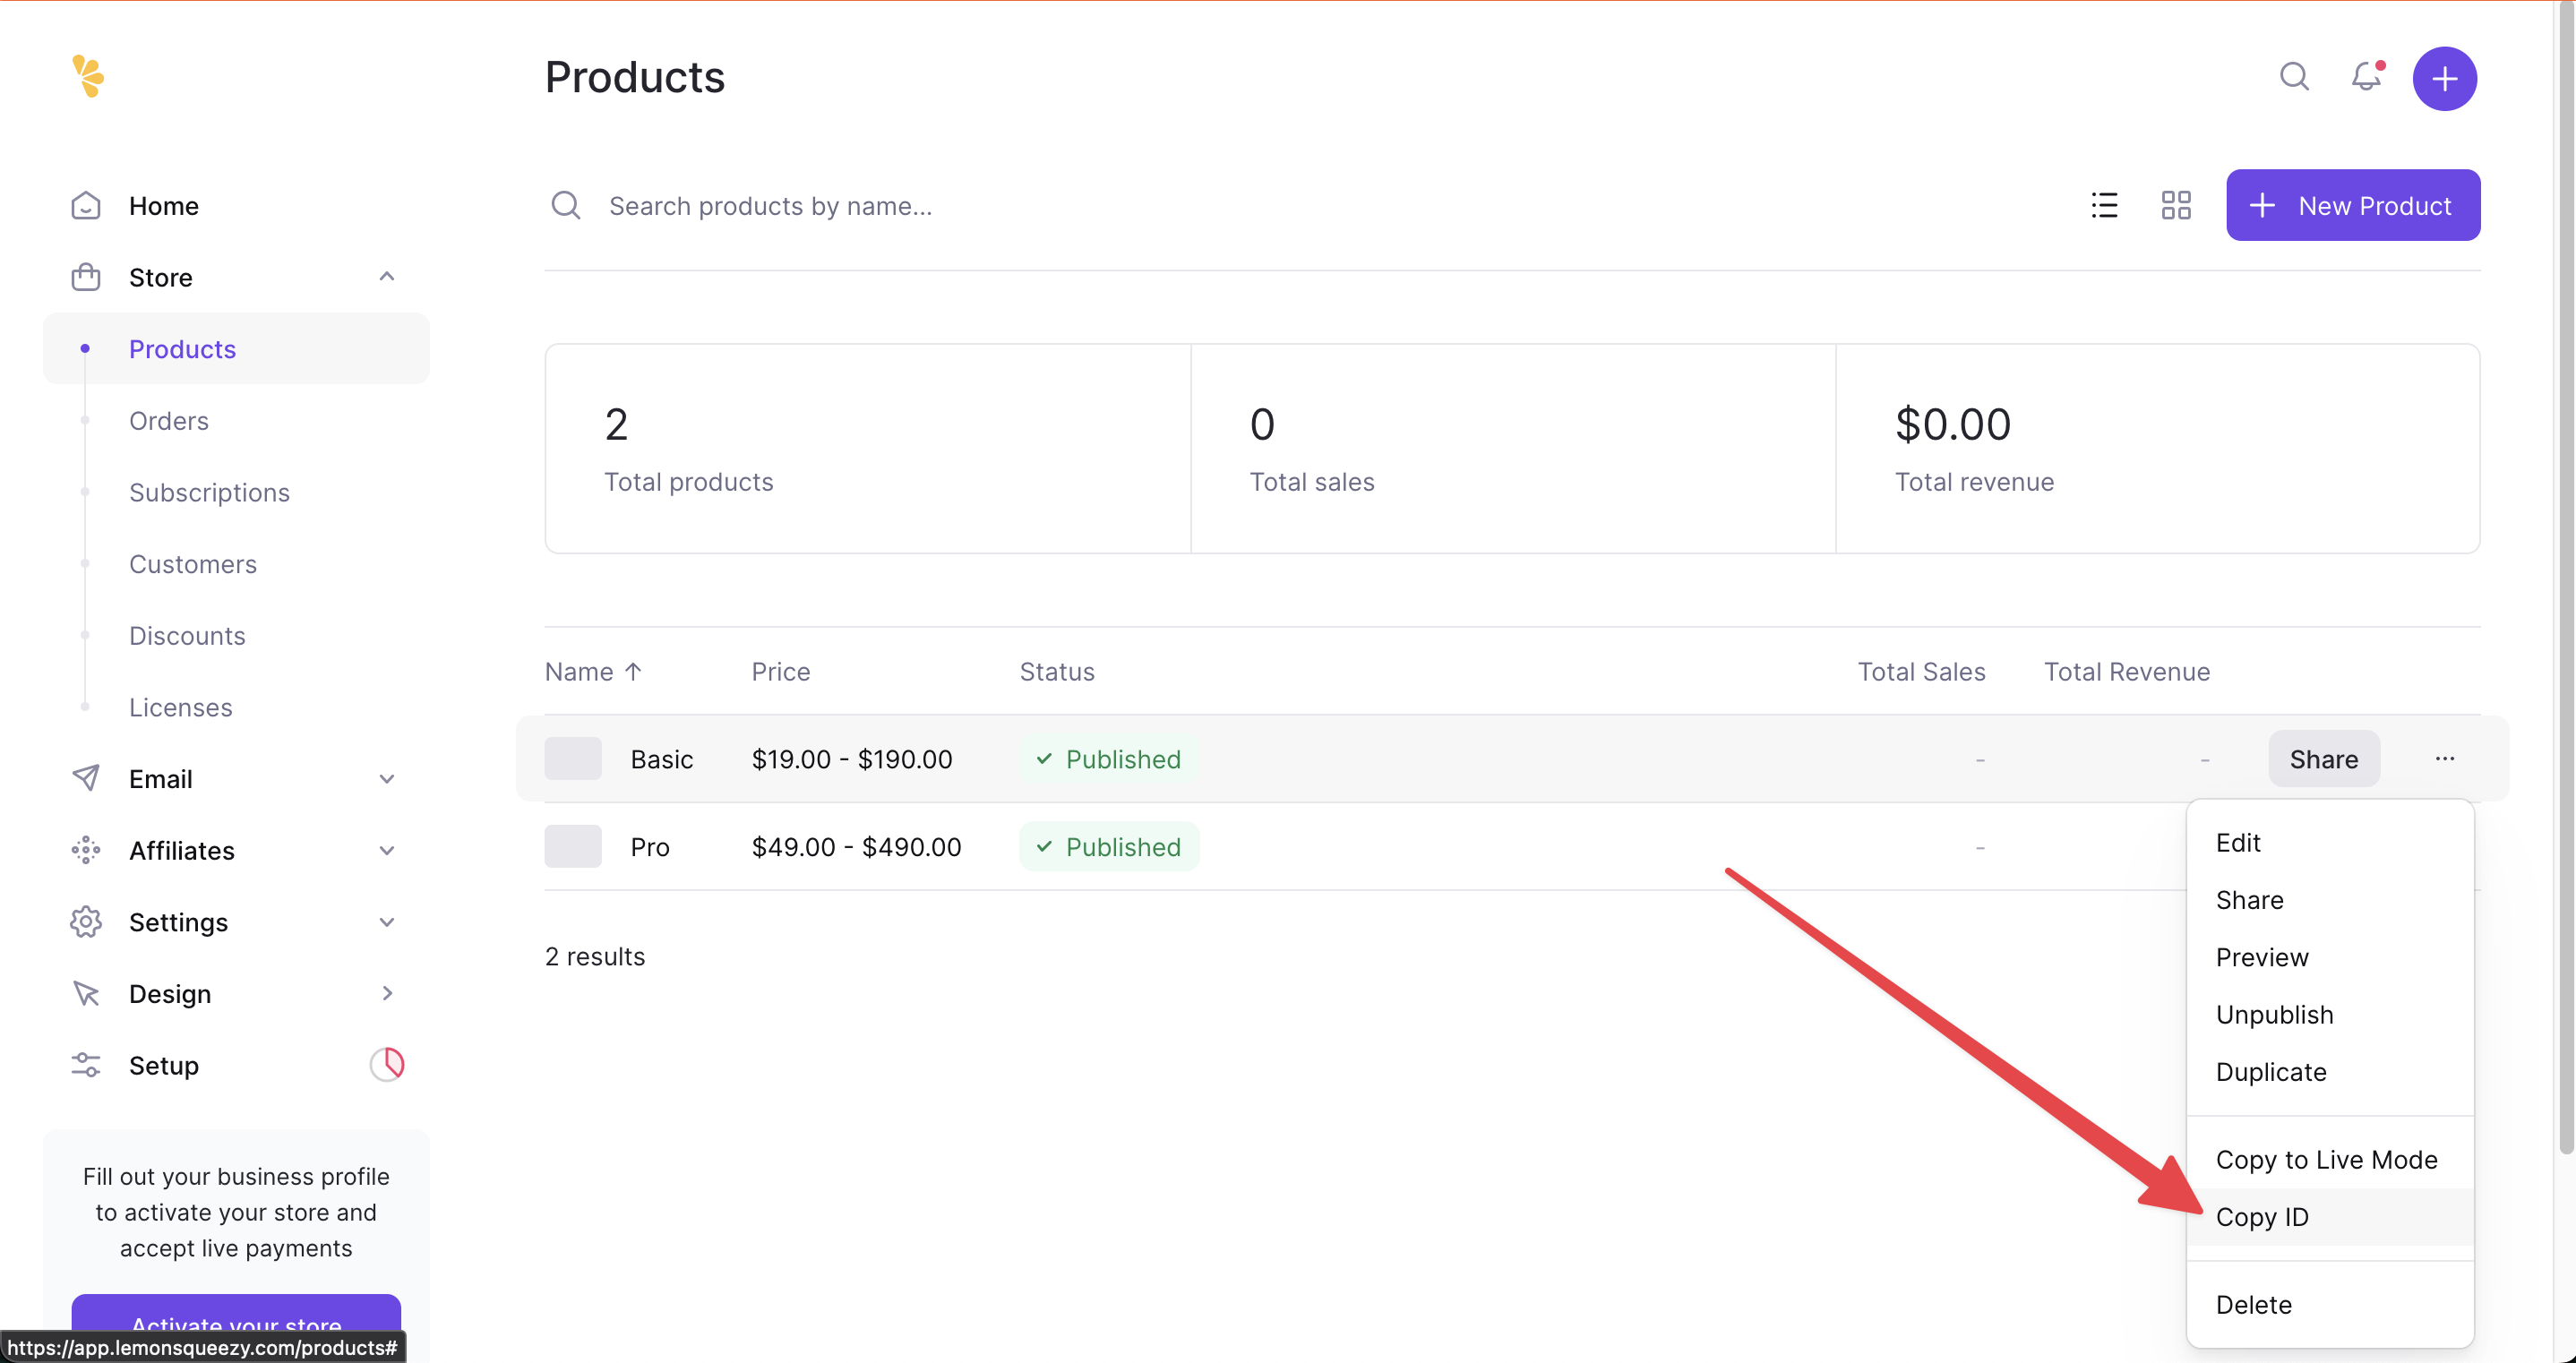
- Paste the Product ID into the
config/plans.ymlfile for the respective plan, in theprice_idfield (StartKit uses theprice_idvariable name but we need the Product Id from Lemon Squeezy).
Creating checkouts
Checkout links are the quickest way to direct a customer to a checkout page with Lemon Squeezy.
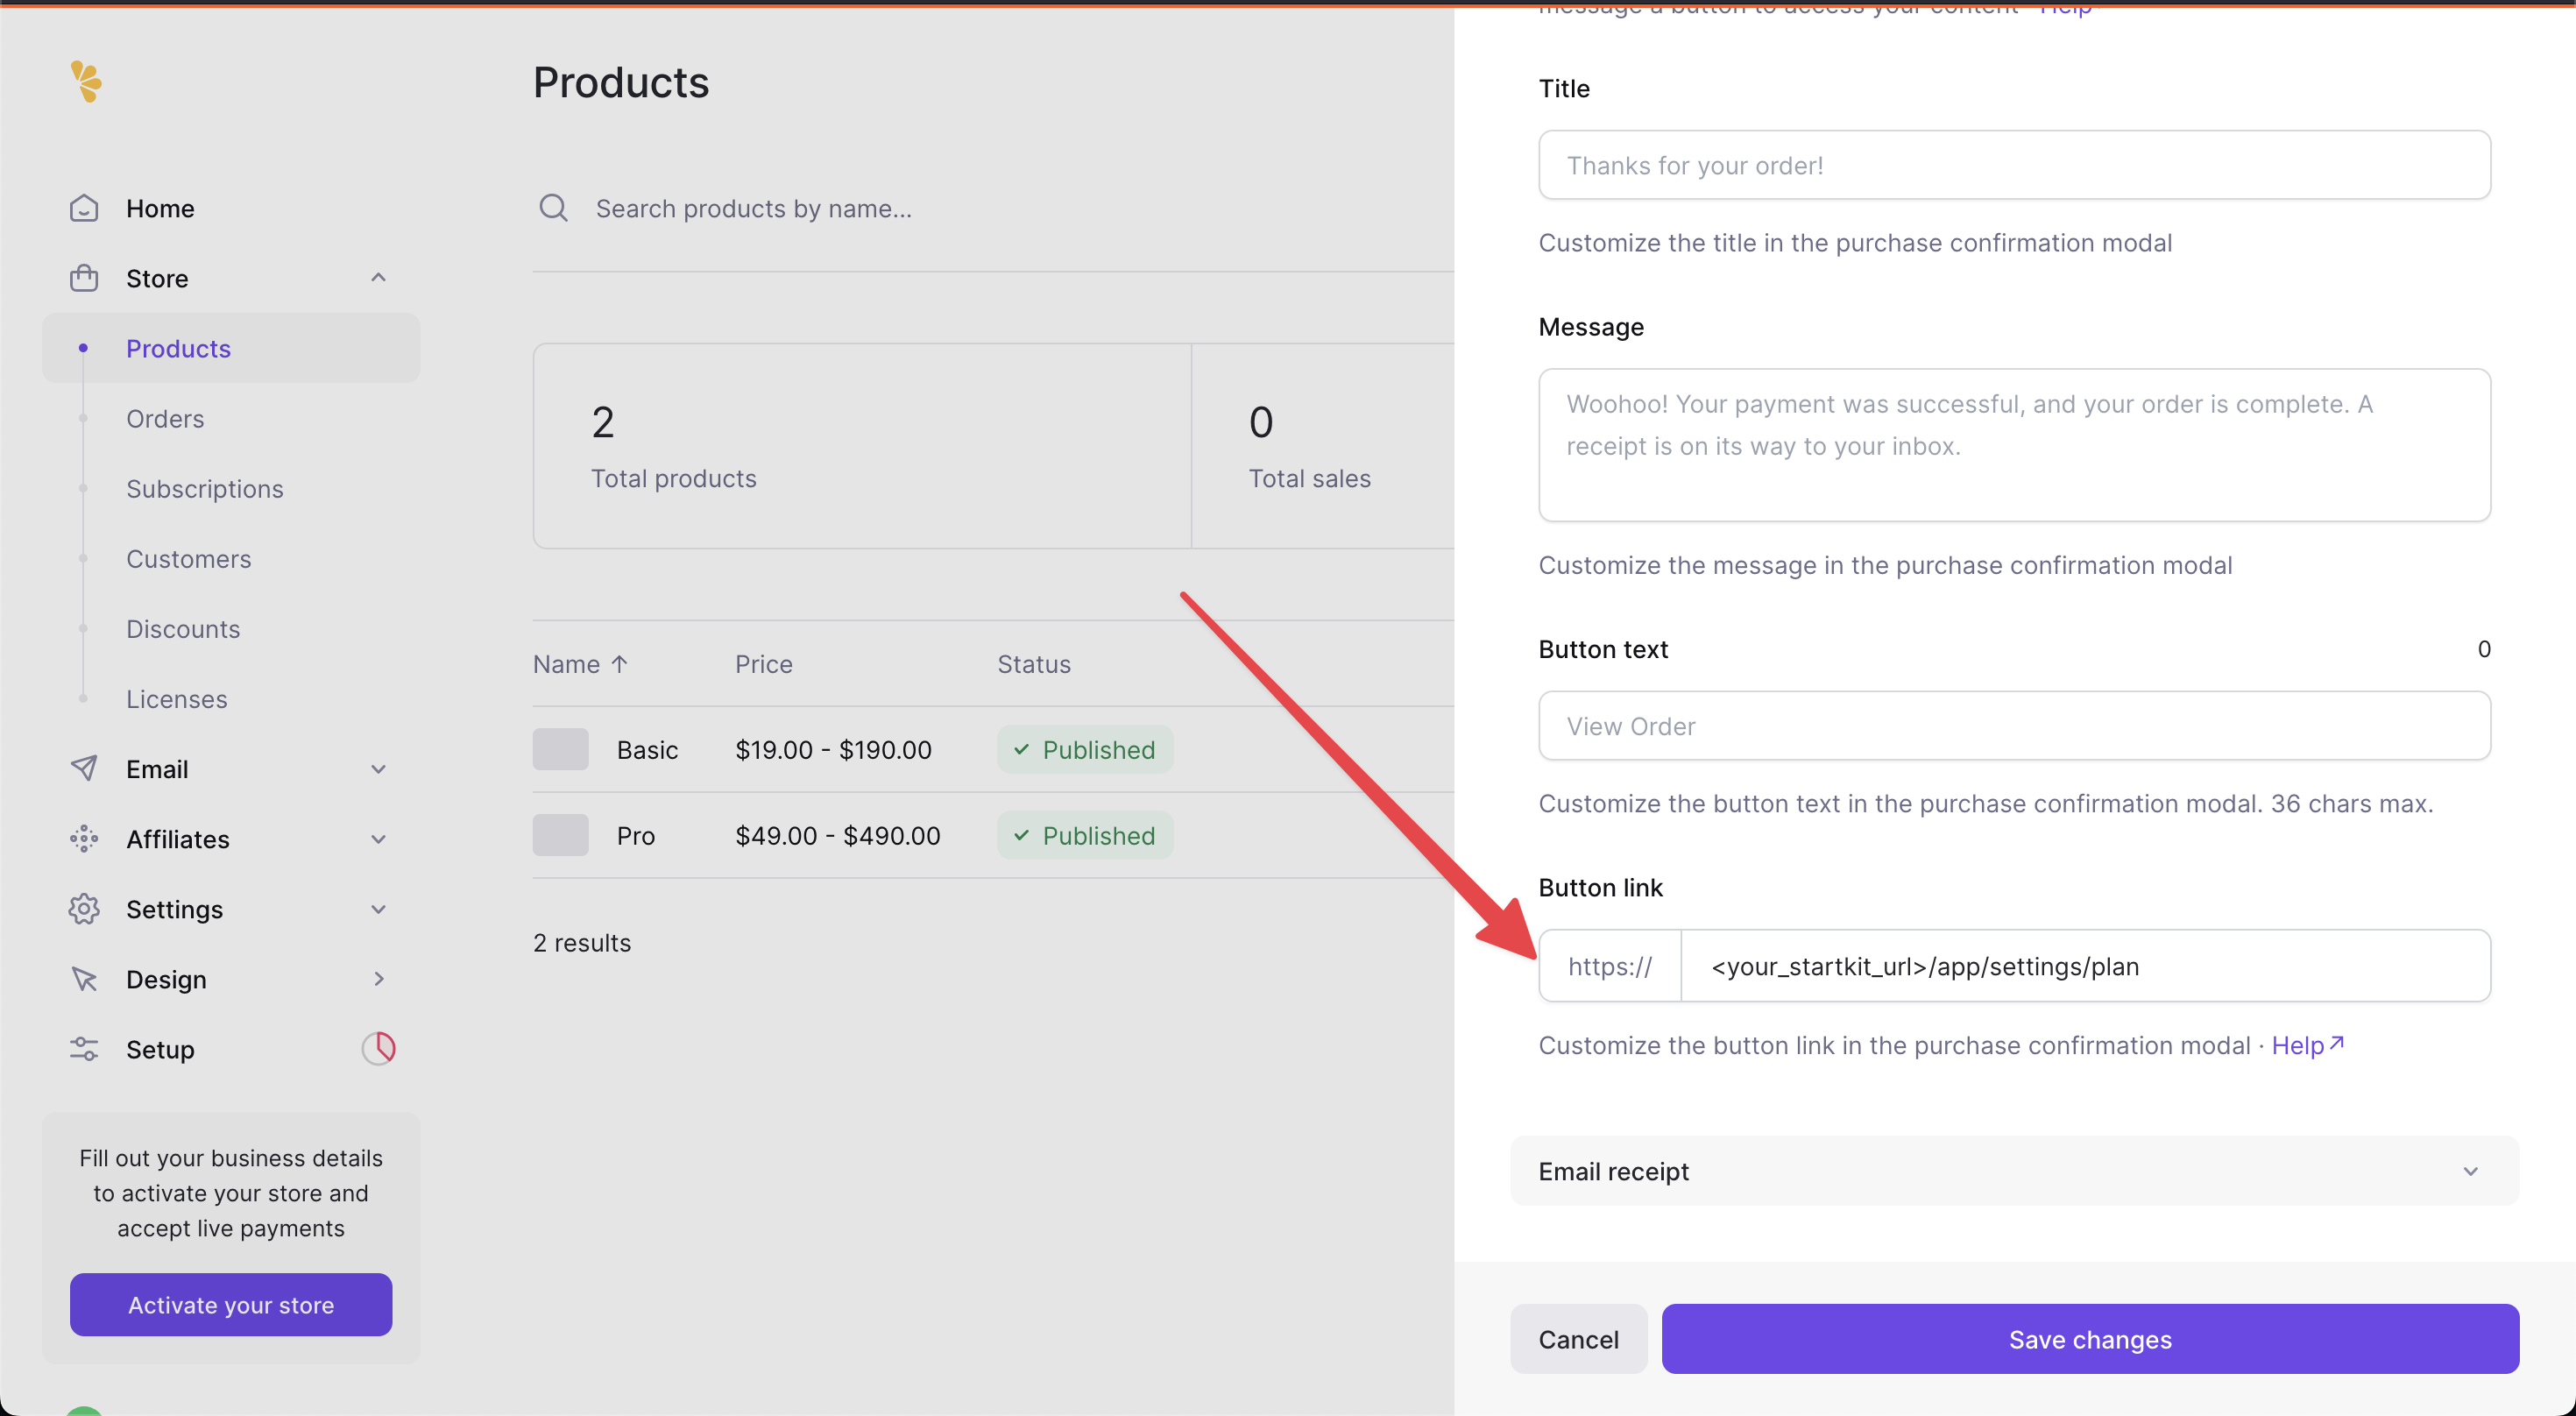
- Go to your products.
- Edit each product, open the settings for Confirmation Modal, and set the Button link to redirect back to StartKit. Lemon Squeezy only allows
httpslinks so to test in development you’ll need to use a tool like ngrok to forward the requests to your local environment.
- Save the changes and then from the list view click Share next to each product and copy the checkout link:
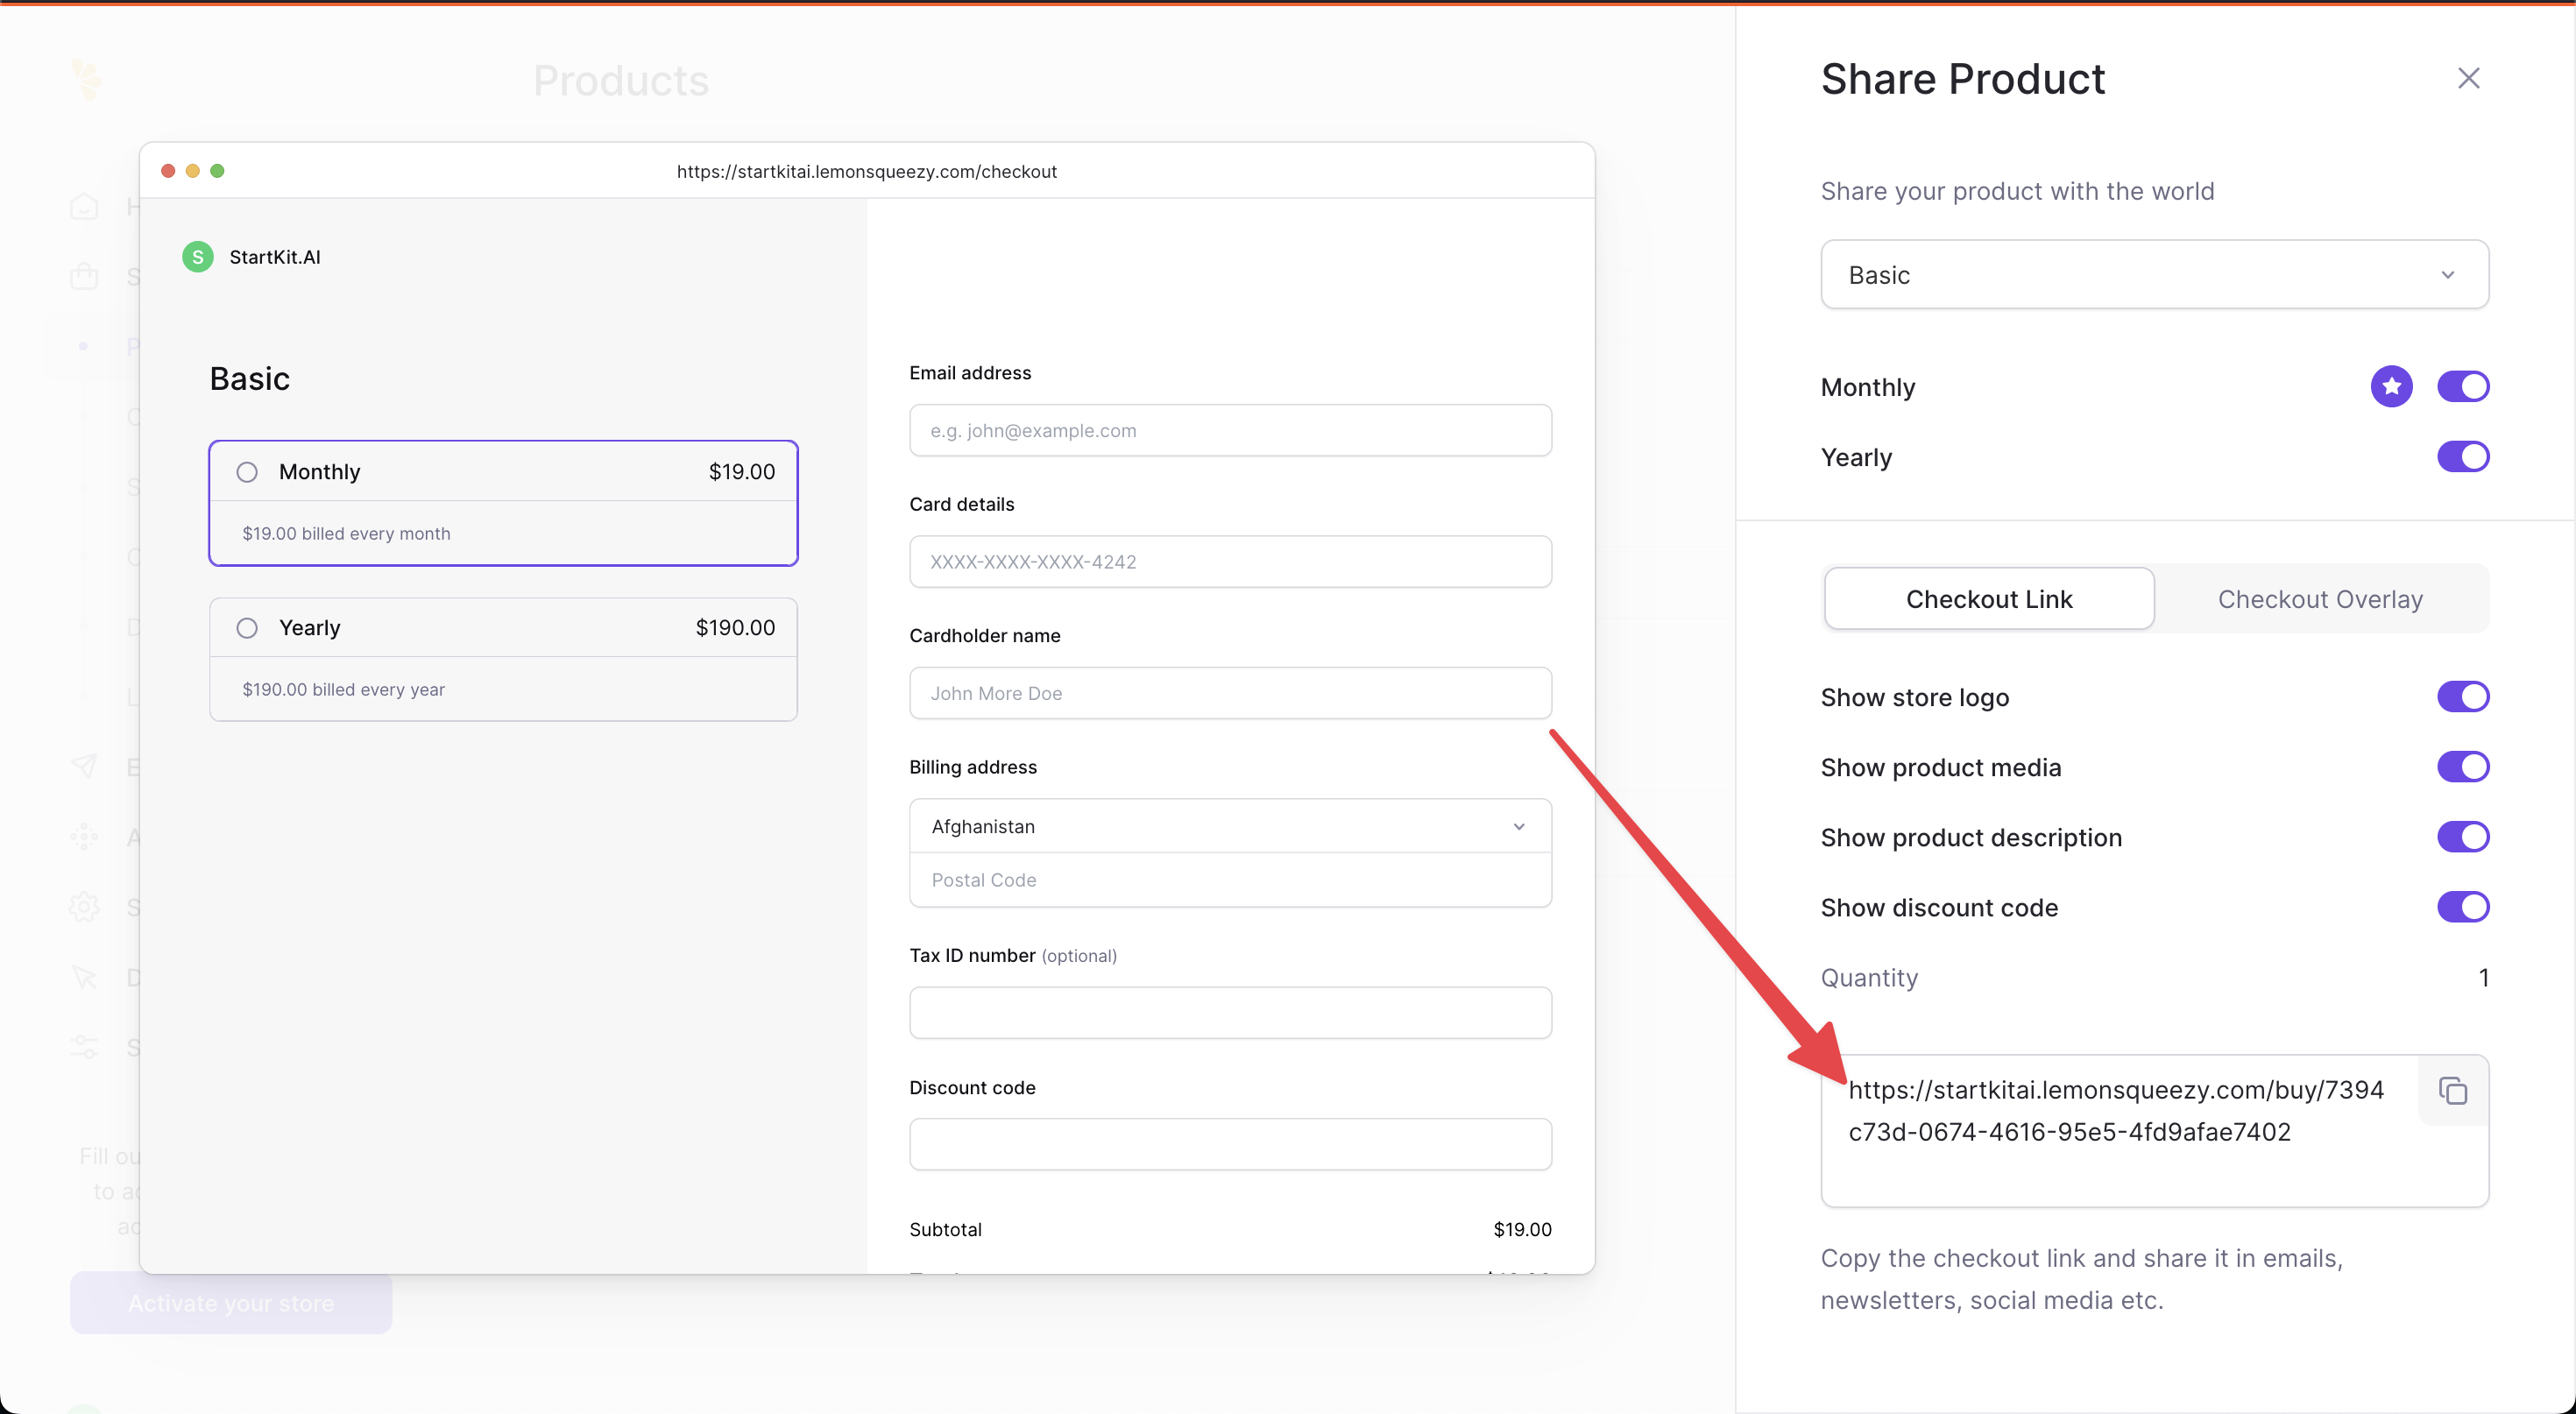
- Paste the checkout link into the
config/plans.ymlfile for the respective plan, in thecheckout_urlfield.
Customer Portal
The Lemon Squeezy customer portal is lets customers self-manage their subscriptions from your store.
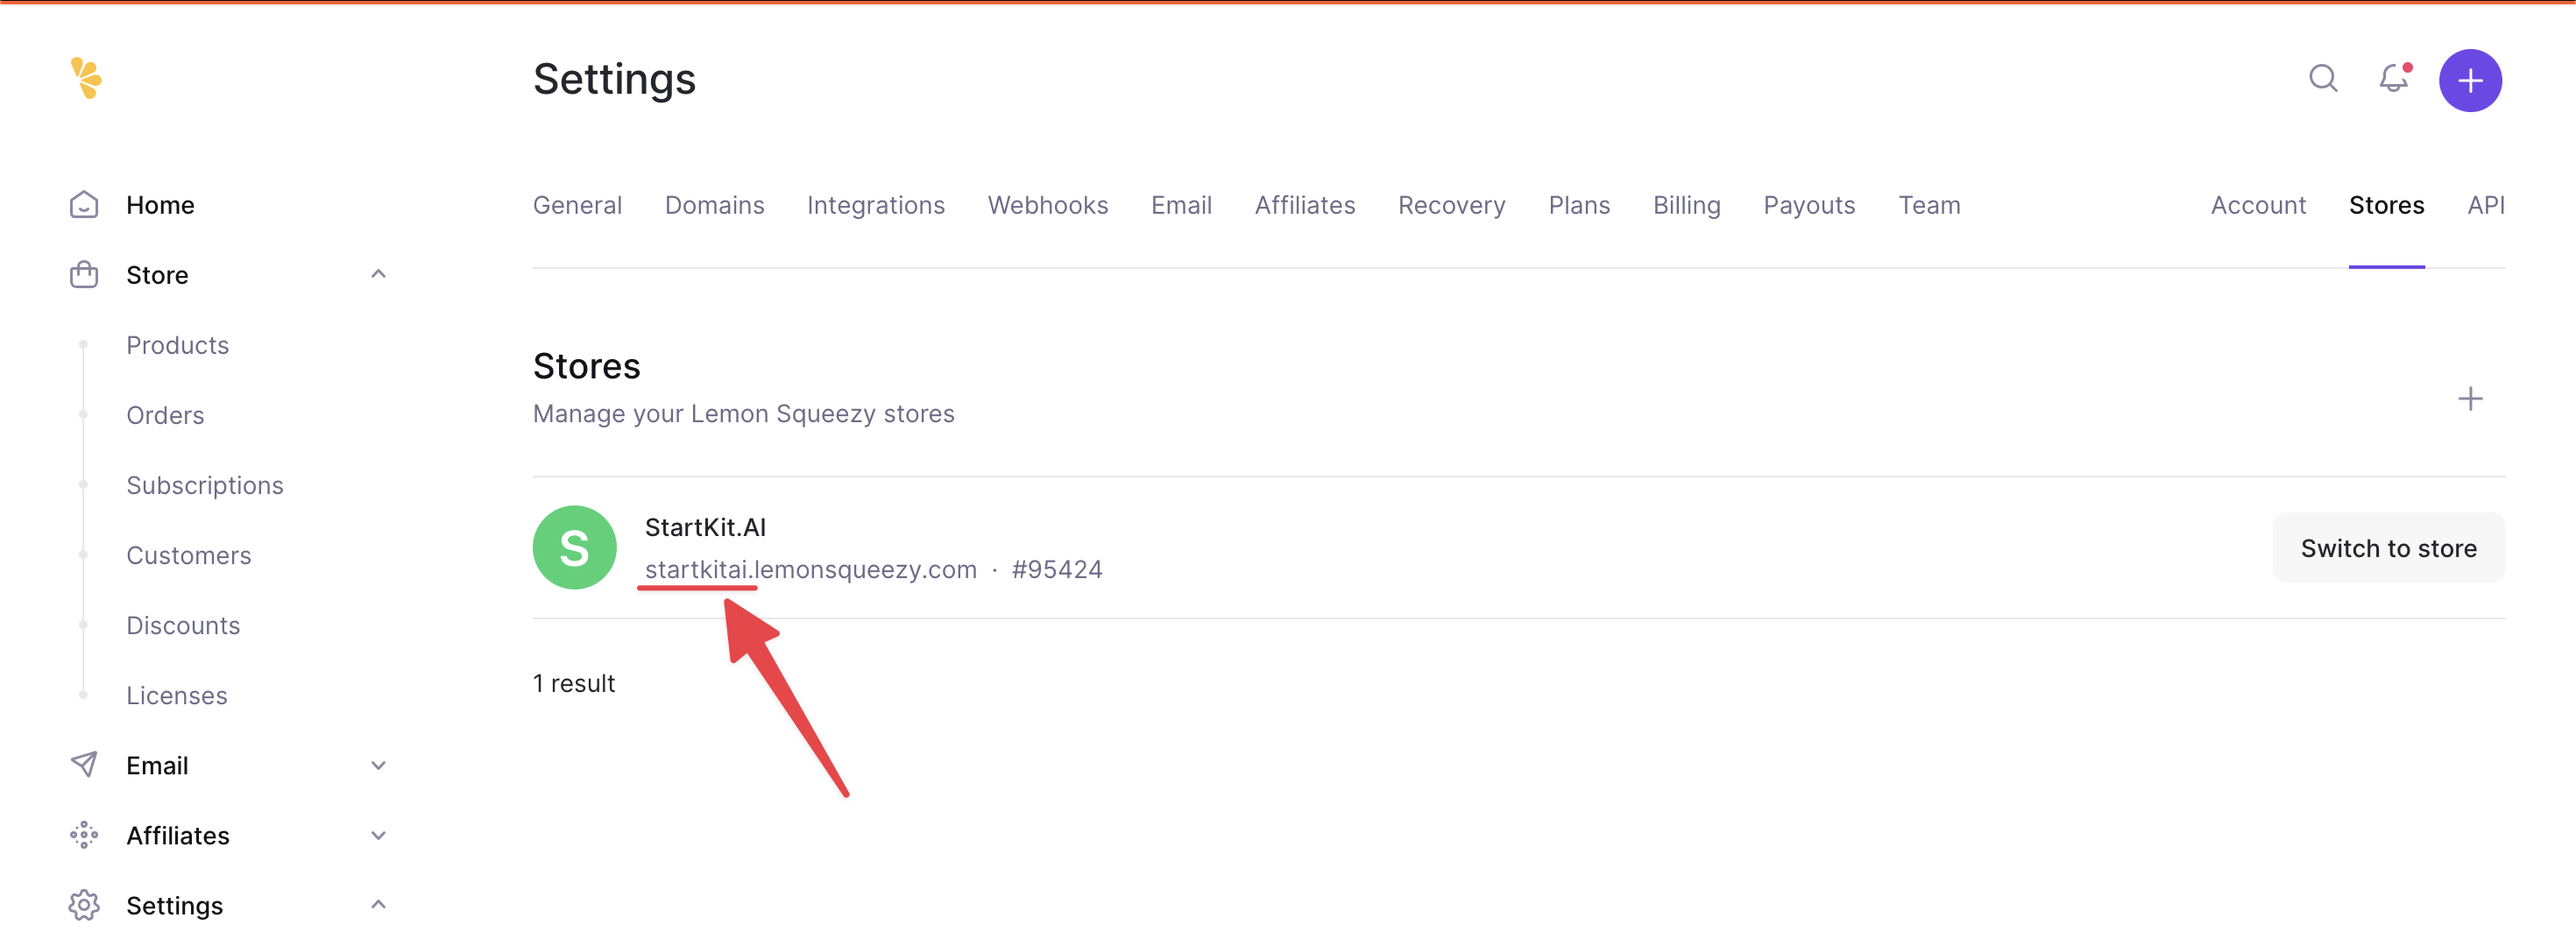
- Go to Stores to get your store name
- Your customer portal URL will be
https://[STORE].lemonsqueezy.com/billingso ours would behttps://startkitai.lemonsqueezy.com/billing
- Paste the link into your
.envas theVITE_CUSTOMER_PORTAL_URL
VITE_CUSTOMER_PORTAL_URL=Lemon Squeezy Webhooks
Webhooks are how Lemon Squeezy lets you know that you’ve received a payment. In the case of StartKit.AI, we have an API route that you can provide to Lemon Squeezy which will provision a users’ account after they pay using the limits set in the plans.yml file.
- Go to Settings -> API, create an API key and enter it into your
.env
LEMONSQUEEZY_API_KEY=- Go to Settings -> Webhooks and add the endpoint for
https://<your_startkit_url>/api/webhooks/payments(you can change this url later if you don’t know your domain yet).
Generate a signing secret like this:
openssl rand -base64 24 | tr -dc A-Za-z0-9 | head -c 40Enter the signing secret into both your webhook setup and your .env:
LEMONSQUEEZY_WEBHOOK_SECRET=You should listen to the following events at a minimum (you can add more later if you want):
subscription_createdsubscription_updatedsubscription_cancelledsubscription_resumedsubscription_expired
Testing locally in development
It’s possible to test the Lemon Squeezy webhooks locally by using a tool like ngrok to forward the requests to your localhost URL.
Or you can simulate webhook events from the Lemon Squeezy dashboard - see their developer guide for more information.
In production
- In test mode of the Lemon Squeezy Dashboard, copy your products to live mode and copy the Product IDs into your
plans.yamlfile (see the Lemon Squeezy Setup section above). - Copy your checkout links to live mode and edit the confirmation modal button link redirect for each one to your live url
https://<your_startkit_url>/app/settings/plan. - Turn off test mode in your Stripe dashboard.
- In Settings -> API create a production API key and add it to
LEMONSQUEEZY_API_KEY=in your production environment variables. - In Settings -> Webhooks create the live webhook at
https://<your_startkit_url>/api/webhooks/paymentsif you haven’t already. Copy the live signing secret you enter, and enter inLEMONSQUEEZY_WEBHOOK_SECRET=in your production environment variables.
LEMONSQUEEZY_API_KEY=LEMONSQUEEZY_WEBHOOK_SECRET=Lemon Squeezy Webhook Events
StartKit.AI implements the following Lemon Squeezy webhooks and actions them:
switch (meta.event_name) { case 'subscription_created': { // The user completed the checkout and paid successfully // ✨ Provision access to your product await handleCheckoutCompleted(data.attributes); break; } case 'subscription_updated': { // The user changed their subscription. // ✨ If the plan was upgraded or downgraded change access to your product handleSubscriptionUpdated(data.attributes); break; } case 'subscription_cancelled': { // The user canceled their subscription // Set the subscription to canceled but keep access until the end date handleSubscriptionCanceled(data.attributes); break; } case 'subscription_resumed': { // The user resumed a previously canceled subscription // Set the subscription to resumed and remove end date handleSubscriptionReactivated(data.attributes); break; } case 'subscription_expired': { // The user deleted their subscription // 🚫 Remove access to your product handleSubscriptionDeleted(data.attributes); break; }}Feel free to add any other webhook actions that you need into this switch statement.