How to build a ChatGPT Clone
In this guide we’re going to write a ChatGPT chatbot and deploy it to DigitalOcean.
The whole tutorial should take 10-20 minutes and will walk you through setting up the project, connecting the services, configuring the deployment, and customising your app.
This guide is also available to watch on YouTube here.
Project Setup
1. Run the Getting Started Script
Our setup wizard guides you through getting started, run it and follow along with the next steps, entering the values when prompted. If you don’t have access to StartKit yet, you need to purchase it!
npm create startkit.ai@latest2. Connect a MongoDB database
StartKit.AI uses MongoDB as it’s primary database. MongoDB has the benefit of being very easy to prototype with - our priority when getting a project running quickly!
Setup Atlas
We recommend creating a new database using MongoDB Atlas.
- Visit the Mongo Atlas website: https://www.mongodb.com/cloud/atlas
- Create an account and follow the setup instructions
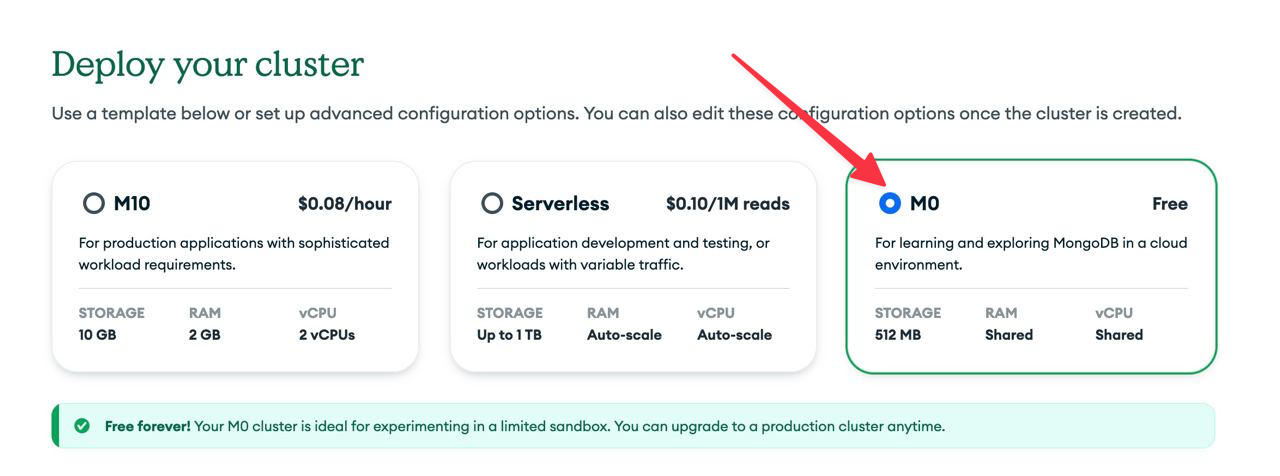
Select the M0 free cluster:
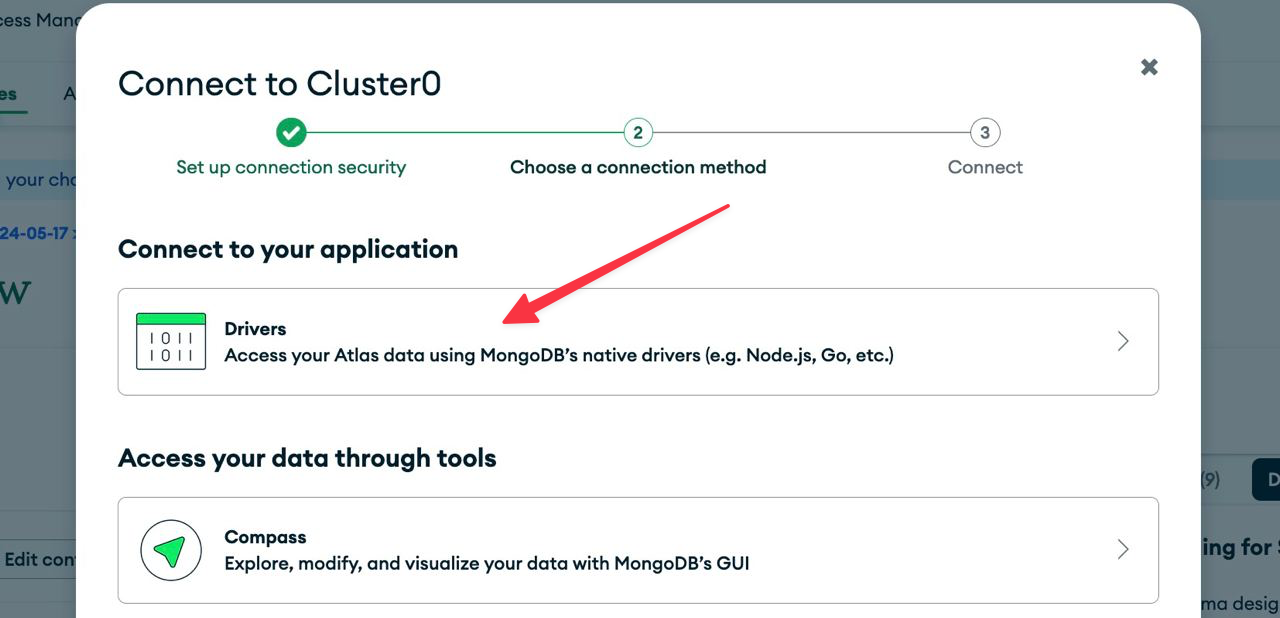
Select connect to your application with Drivers:
- Once your cluster is provisioned you will be provided with a connection string. Copy this into your
.envfile or into the setup script (see below).
MONGO_URI=mongodb+srv://app:<password>@<db>.retdorb.mongodb.net/<dbname(optional)>?retryWrites=true&w=majority&appName=<app_name>When you run StartKit.AI for the first time, it will create the default database collections and data for you, so you don’t need to do any of that yourself.
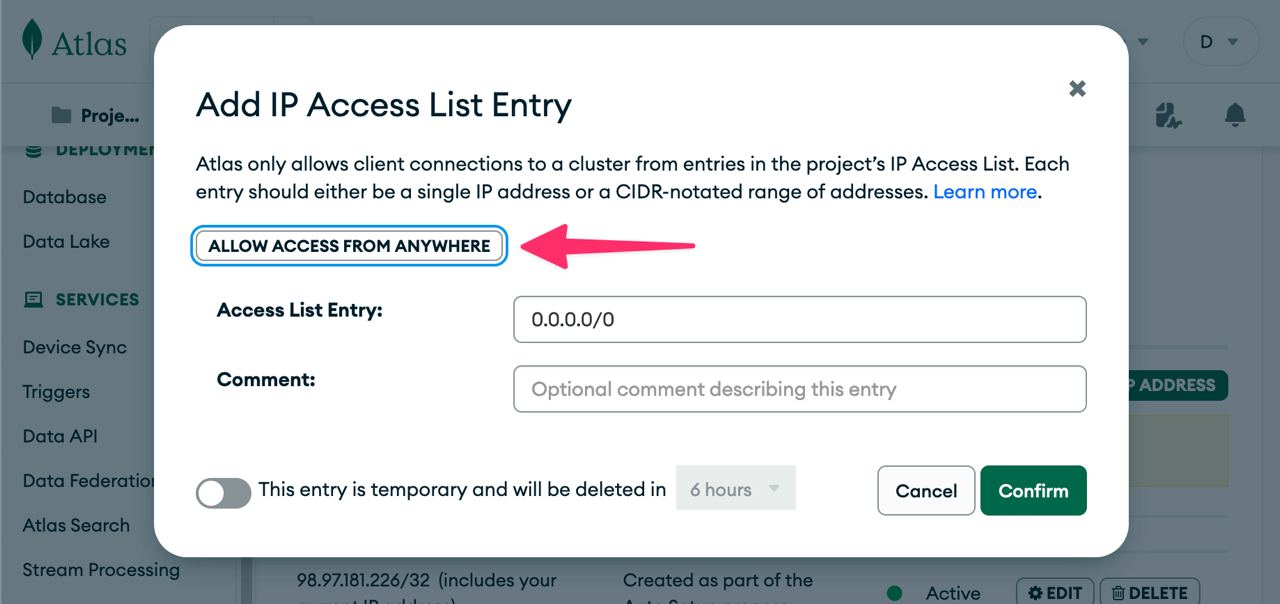
Allow access to your database
Allow access from anywhere in the Mongo Atlas settings (you’ll need this for when we deploy later):
- Go to Security -> Network Access in the sidebar
- Click Add IP Address and set Access List Entry: 0.0.0.0/0
- Hit confirm!
3. Setup S3 Storage
StartKit.AI uses S3-compatible storage for managing images, documents, and any other files a user might upload. We also store any generated images in S3 as by default OpenAI’s image URLs are only available for a short time.
S3 on DigitalOcean
As we’ll be deploying on DigitalOcean we recommend using their S3 solution, called Spaces.
Create a new Space for StartKit.AI and copy the space URL that we need to split up into the variables for the .env file (see below).
Given this space URL:
https://startkit.ai-dev.sfo3.digitaloceanspaces.com
We need the following values:
https://<STORAGE_NAME>.<STORAGE_REGION>.digitaloceanspaces.com
Enter them in the setup wizard alongside STORAGE_SECRET and STORAGE_KEY from the DigitalOcean account settings page here.
STORAGE_NAME=startkit.ai-devSTORAGE_REGION=sfo3STORAGE_URL=https://sfo3.digitaloceanspaces.comSTORAGE_KEY=STORAGE_SECRET=4. Get your OpenAI API Key
To get an OpenAI API Key sign up for an account on the OpenAI website, and then navigate to the API Keys page and click Create new secret key.
Then enter the key into the setup wizard:
OPENAI_KEY=5. Configure StartKit.AI
Select Open for the type of app we’re creating:
What kind of app are you going to create? (You can change this later) (Users) I will have users who sign in and access the API (Admin) I want to make secure requests to the API myself❯ (Open) I want anyone to be able to make requests to the API for freeFor this tutorial we want anyone to be able to visit your ChatGPT app and use with it without a license key, in the future you could ask users to sign up and pay before they use it but we’re keeping it simple for now.
Create your ChatGPT App
Everything you need already exists in /web/example-app. You can just use the parts you need and leave everything else (or delete the bits you don’t need if you want).
- The entry point to the app is
/web/entry-client.jsx. Edit this file and paste this:
import './app.css';
import { RouterProvider, createBrowserRouter } from 'react-router-dom';
// Import and render just the Chat moduleimport Chat from './example-app/modules/chat/Chat';import ReactDOM from 'react-dom/client';
const router = createBrowserRouter([ { path: '/:uuid?', element: ( <Chat fullWidth={true} fullHeight={true} initialMessage={`Hi! I'm your personal ChatGPT clone. Ask me something...`} examples={[]} /> ) }]);
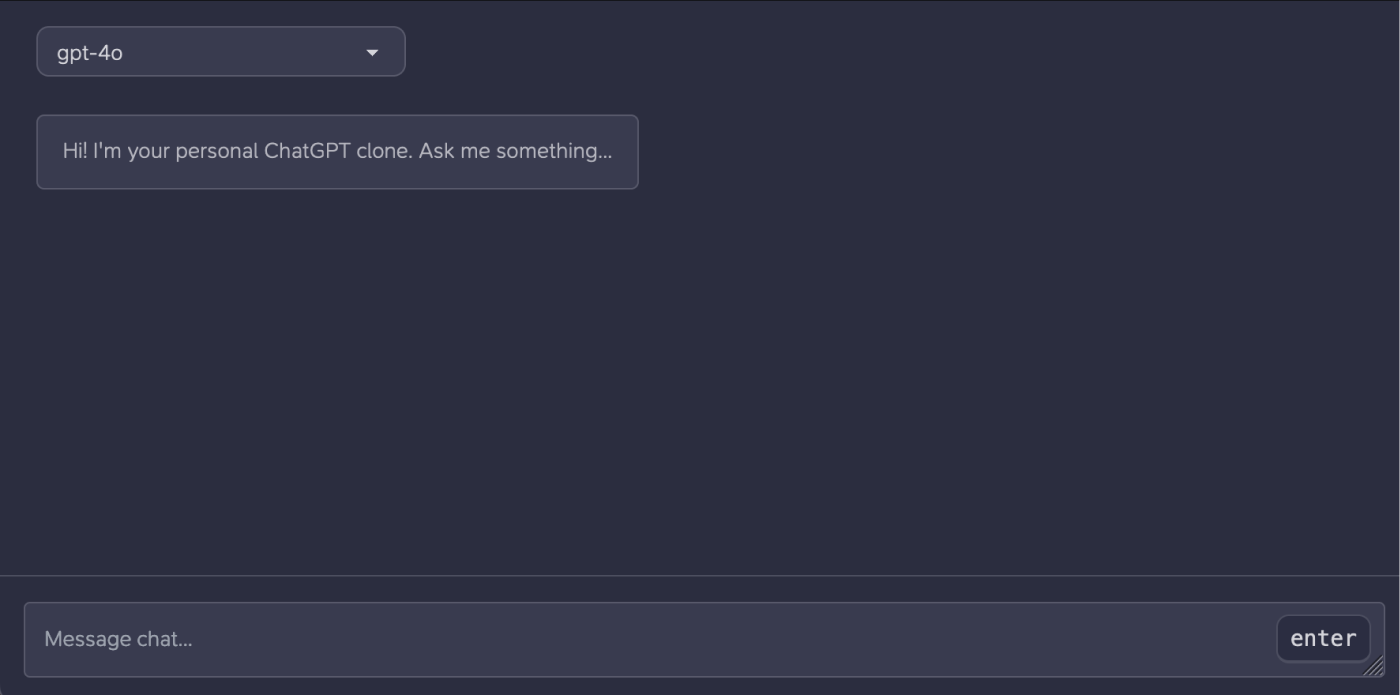
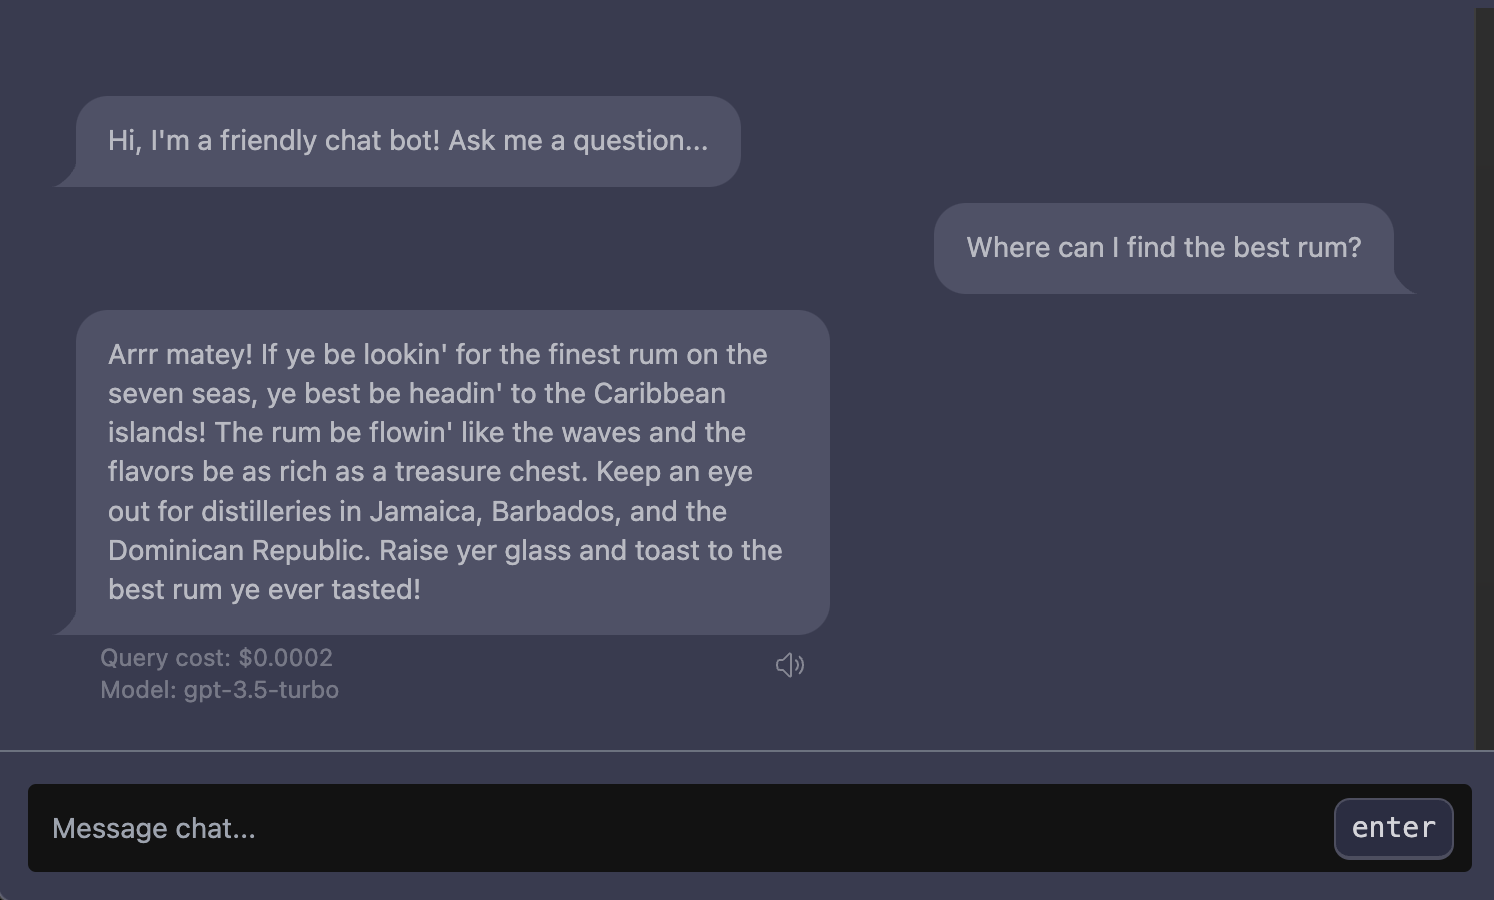
ReactDOM.createRoot(document.getElementById('root')).render( <RouterProvider router={router} />);- Run your app with
yarn dev(ornpm run devwith npm) - 🎉 Your ChatBot is running on http://localhost:1337 and should look like the screen below. Try asking it a question!
Deploy your ChatBot
The quickest and easiest way to deploy is to DigitalOcean’s App Platform which will cost $5/month for the single resource we need.
App Platform is a managed hosting environment, that you can deploy with a single click and will auto-scale your app when needed.
So let’s get deploying!
1. Grant access to your repo
First you need to give DigitalOcean access to your GitHub account using this link, this lets them know what repos you can access:
https://github.com/apps/digitalocean/installations/select_target
2. Create DigitalOcean App
Click this button to create a DigitalOcean App with our default options:
DigitalOcean deploy button for the StartKit.AI Growth plan:

DigitalOcean deploy button for the StartKit.AI Starter plan:
1. Resources
After clicking the button you’ll be greeted by this page:
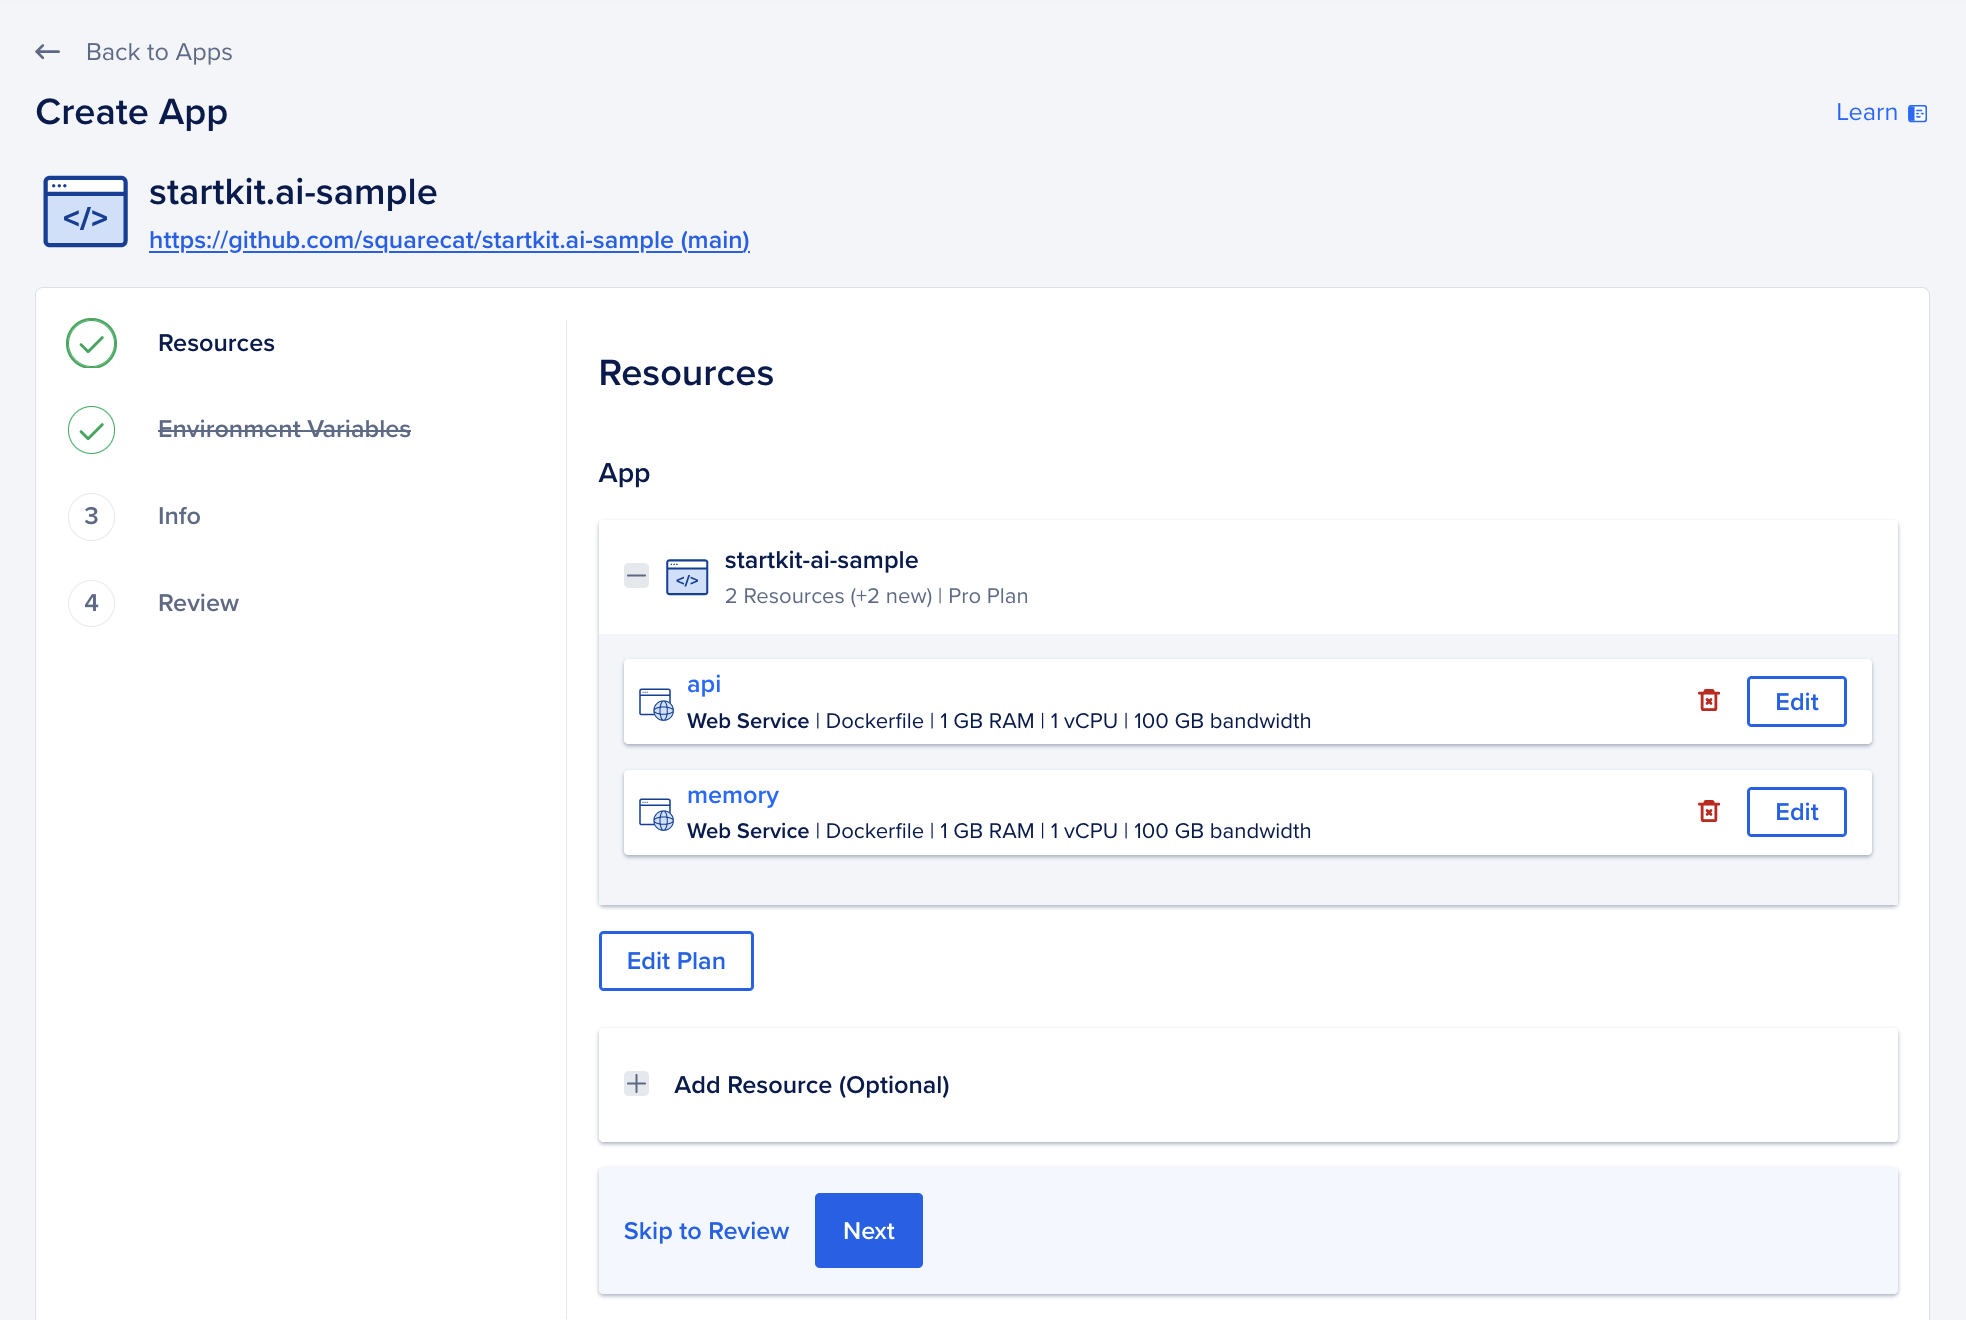
This shows that DigitalOcean will create two resources for you:
- api: The StartKit.AI Node.js server
- memory: The embeddings server with vector db connection to form your AIs memory.
We don’t need the memory resource for this tutorial so make sure you delete it.
2. Environment variables
The default environment variables will be prefilled for you on the next page, but the ones that you created during setup will need to be added.
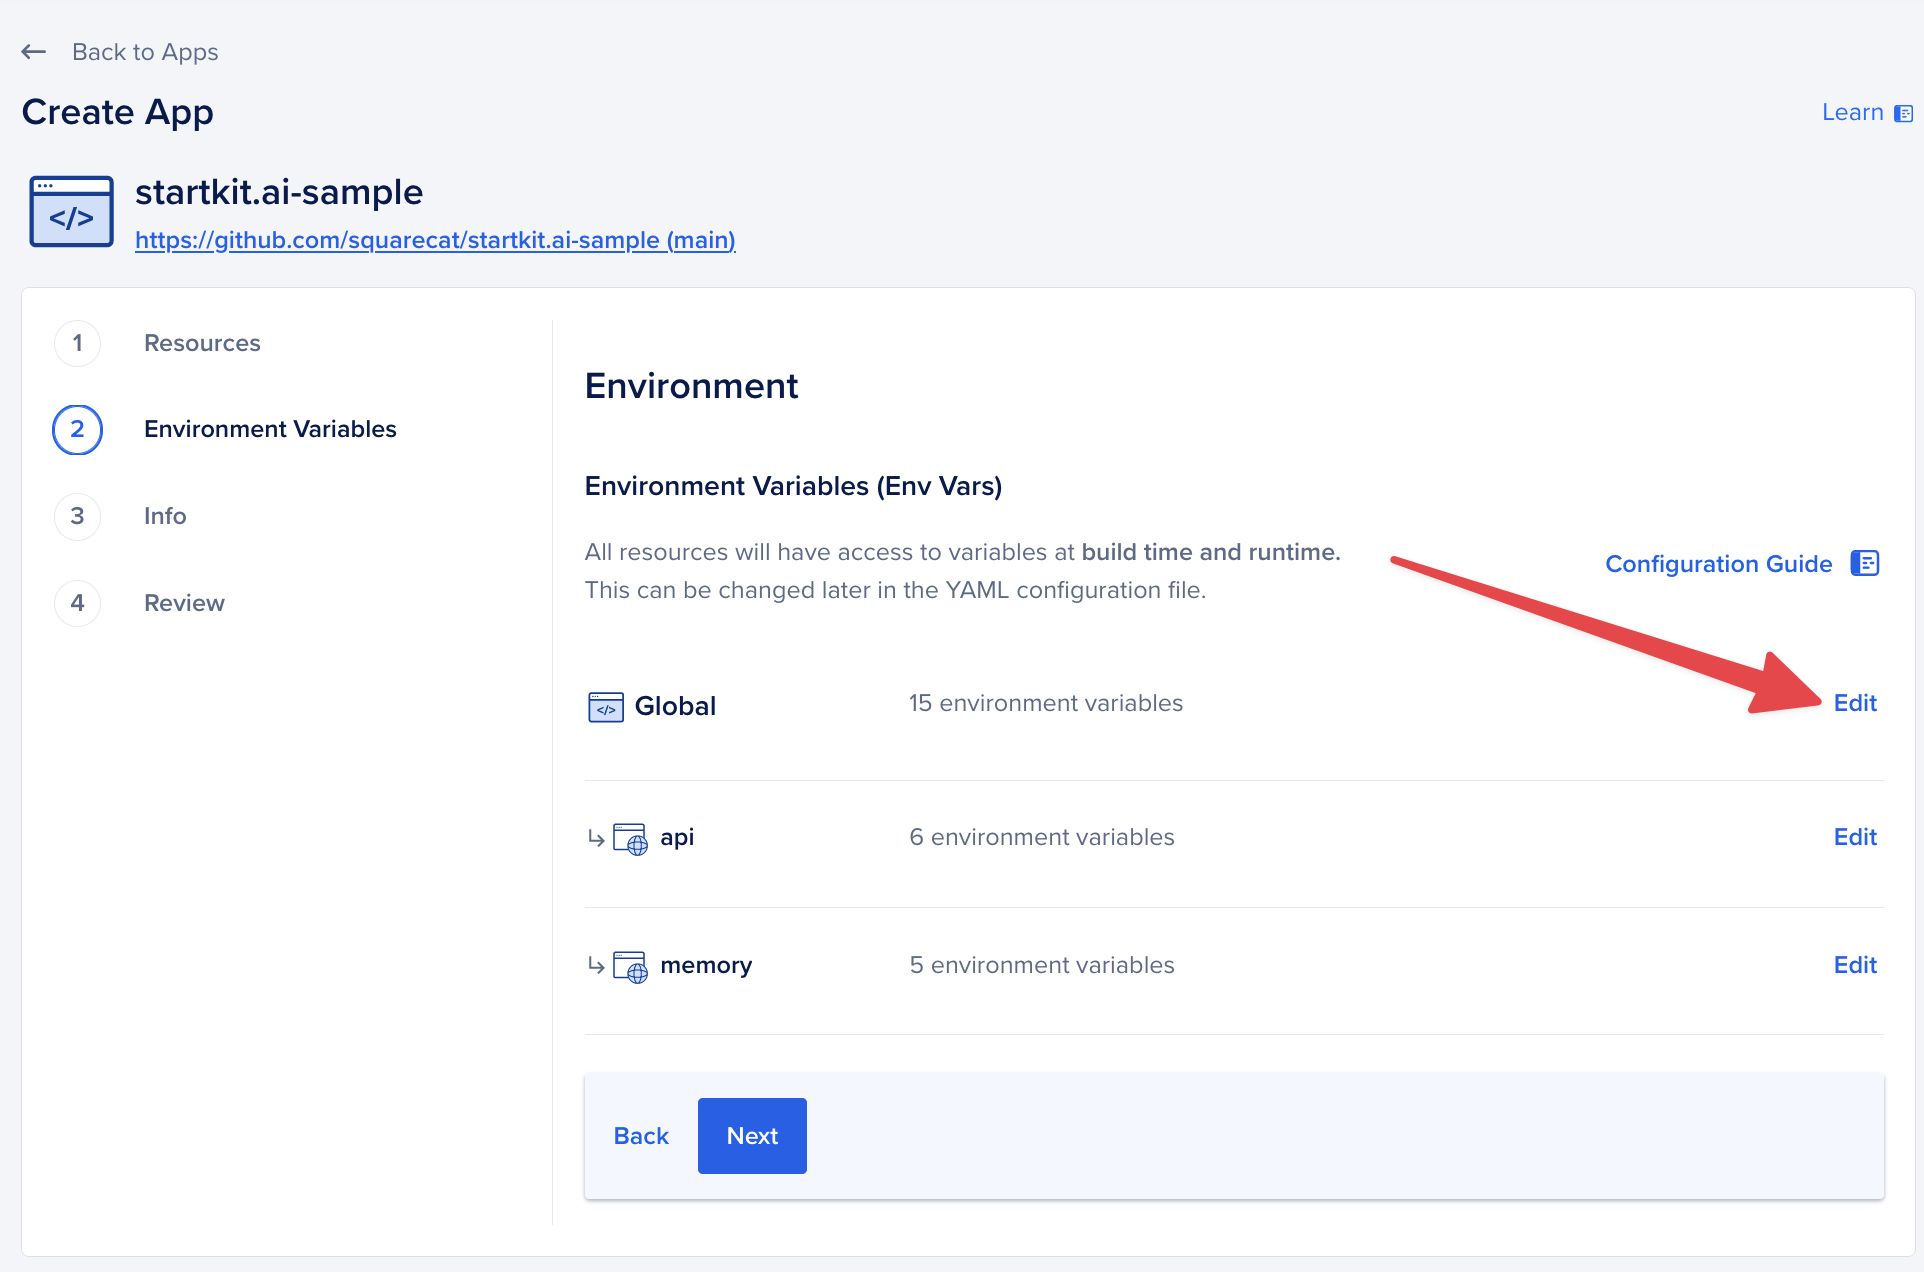
Don’t worry if some of the variables show localhost etc, they will be overwritten with the correct values later.
Now hit next.
3. Create the app
You don’t need to change any of the other settings, so click through to the end of the process and click “Create Resources”.
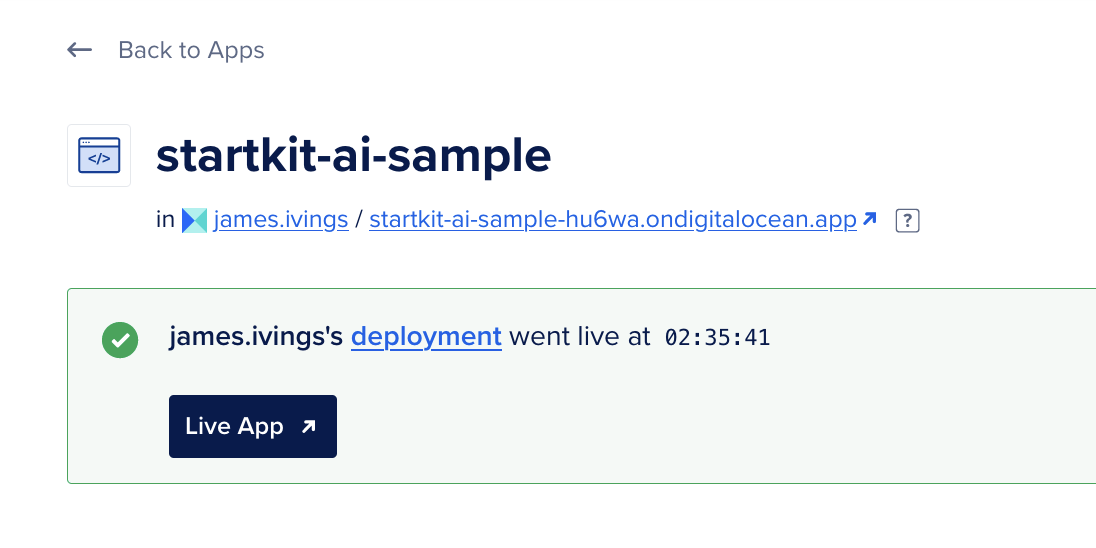
After a few minutes your app will go live.
4. Update the repo
What we’ve just deployed is a version of StartKit.AI from a template GitHub repo, we need to update this to your own repo.
Go to the App Settings page and click “Edit” on the App Spec setting:
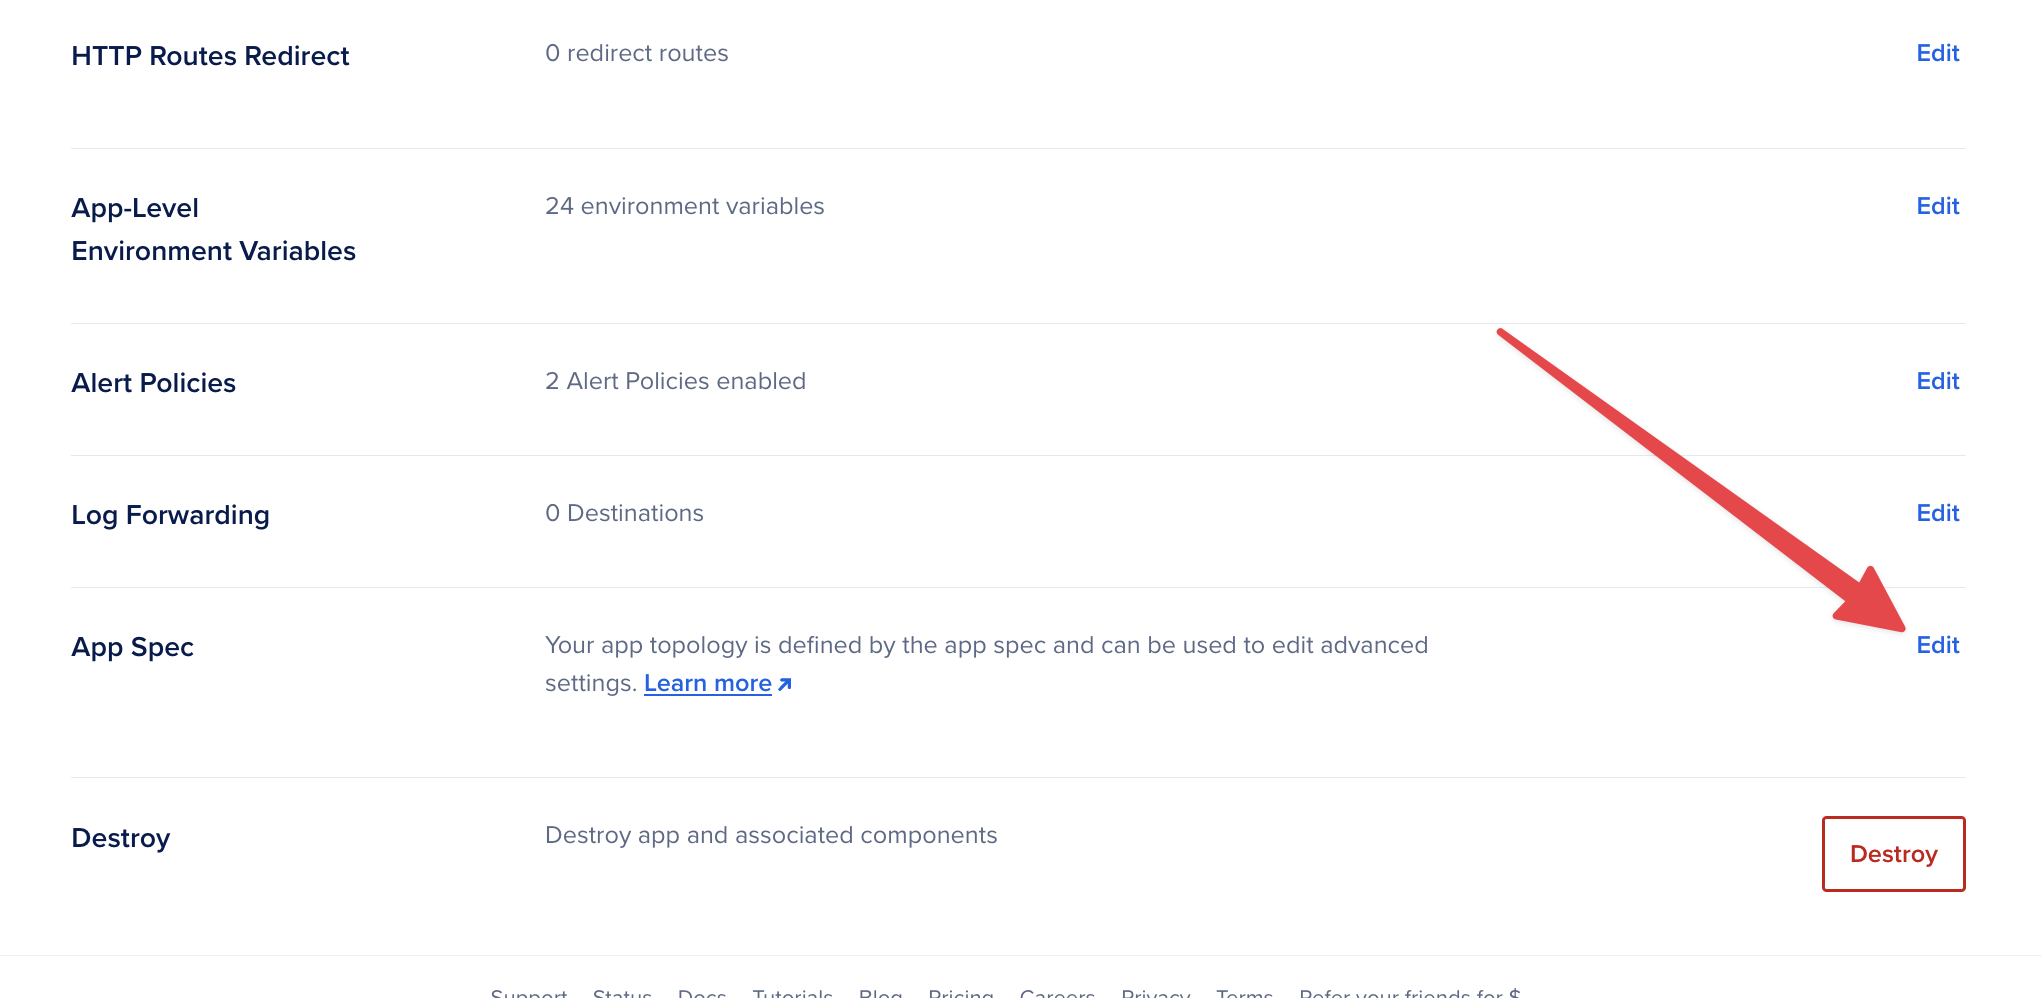
Find the github section, and change startkit-ai/startkit.ai value to the name of your repo.
For example if your project on GitHub is https://github.com/Jivings/my-ai-project, then you’d change the value to Jivings/my-ai-project.
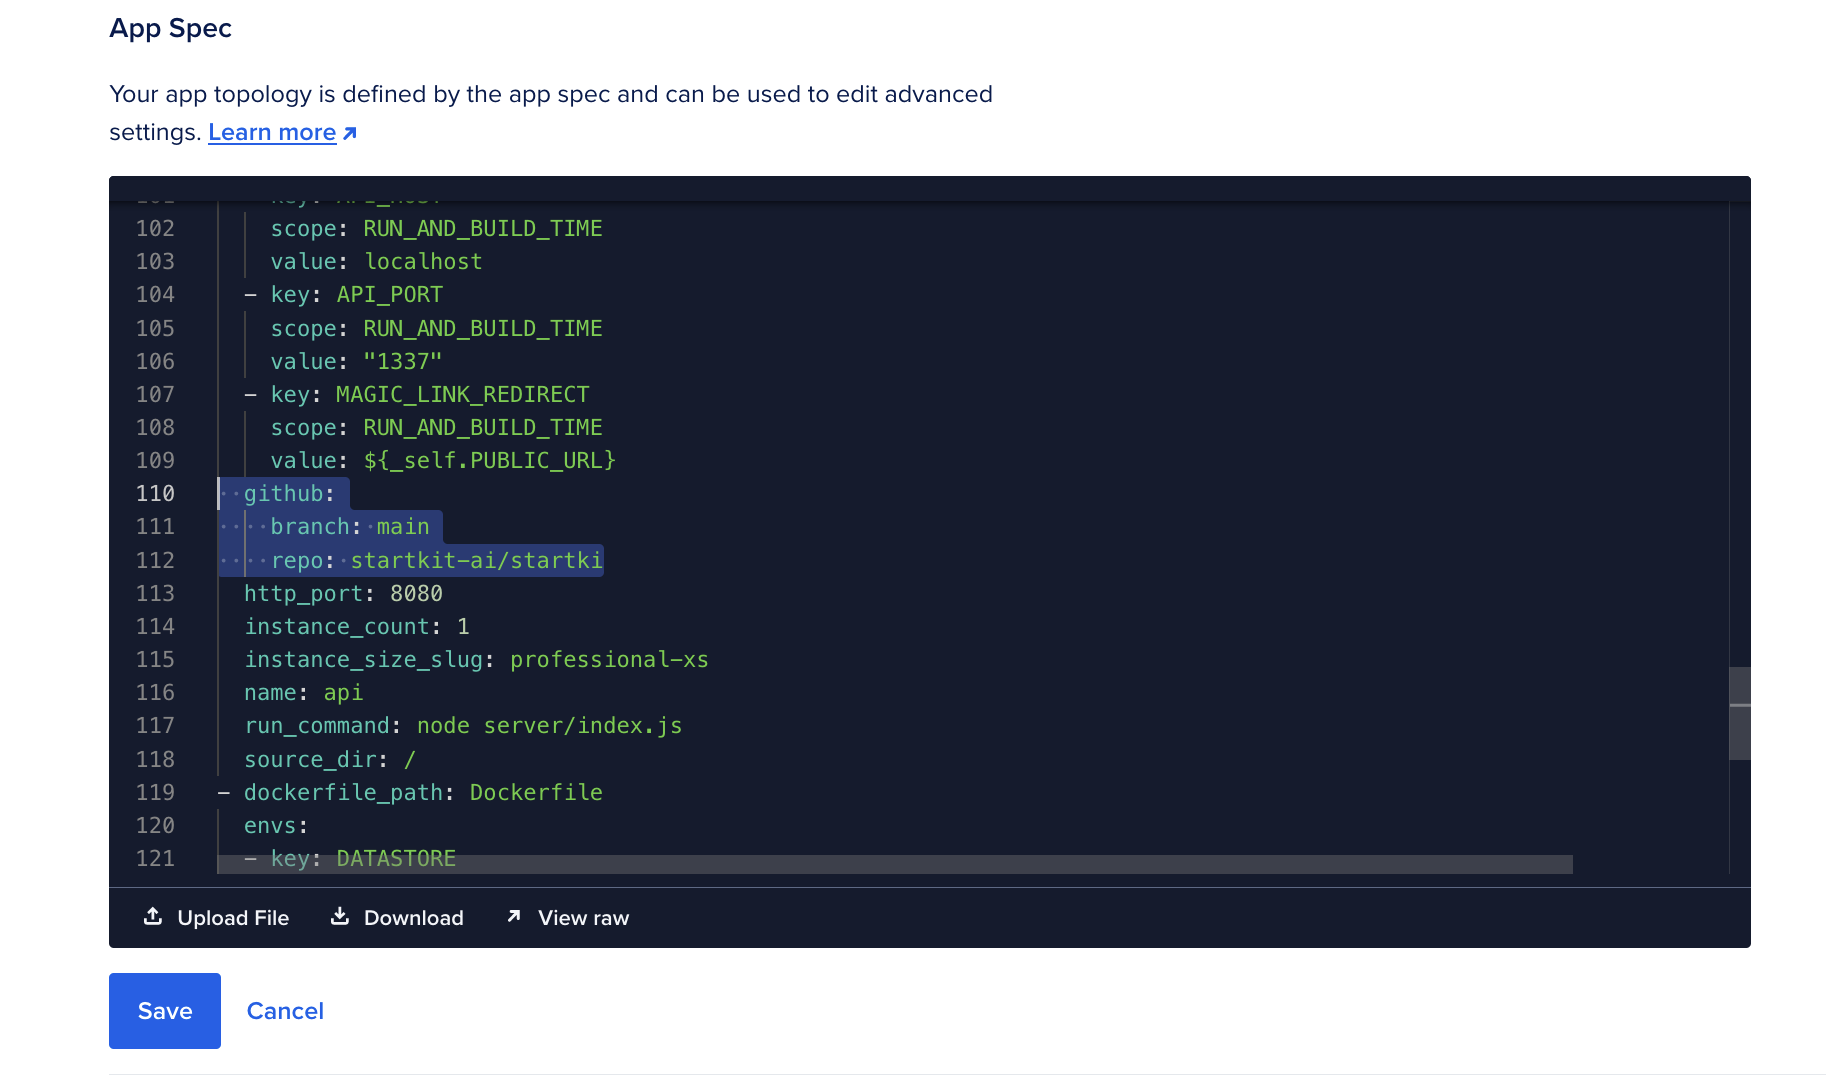
Hit save and your app will re-deploy with your code instead of ours!
Now your app should be running! 🚀
3. Add custom domain
On DigitalOcean Apps, click on your app, and click on the Settings tab. Then, click the Edit link to the right of Domains, and the Add Domain button.
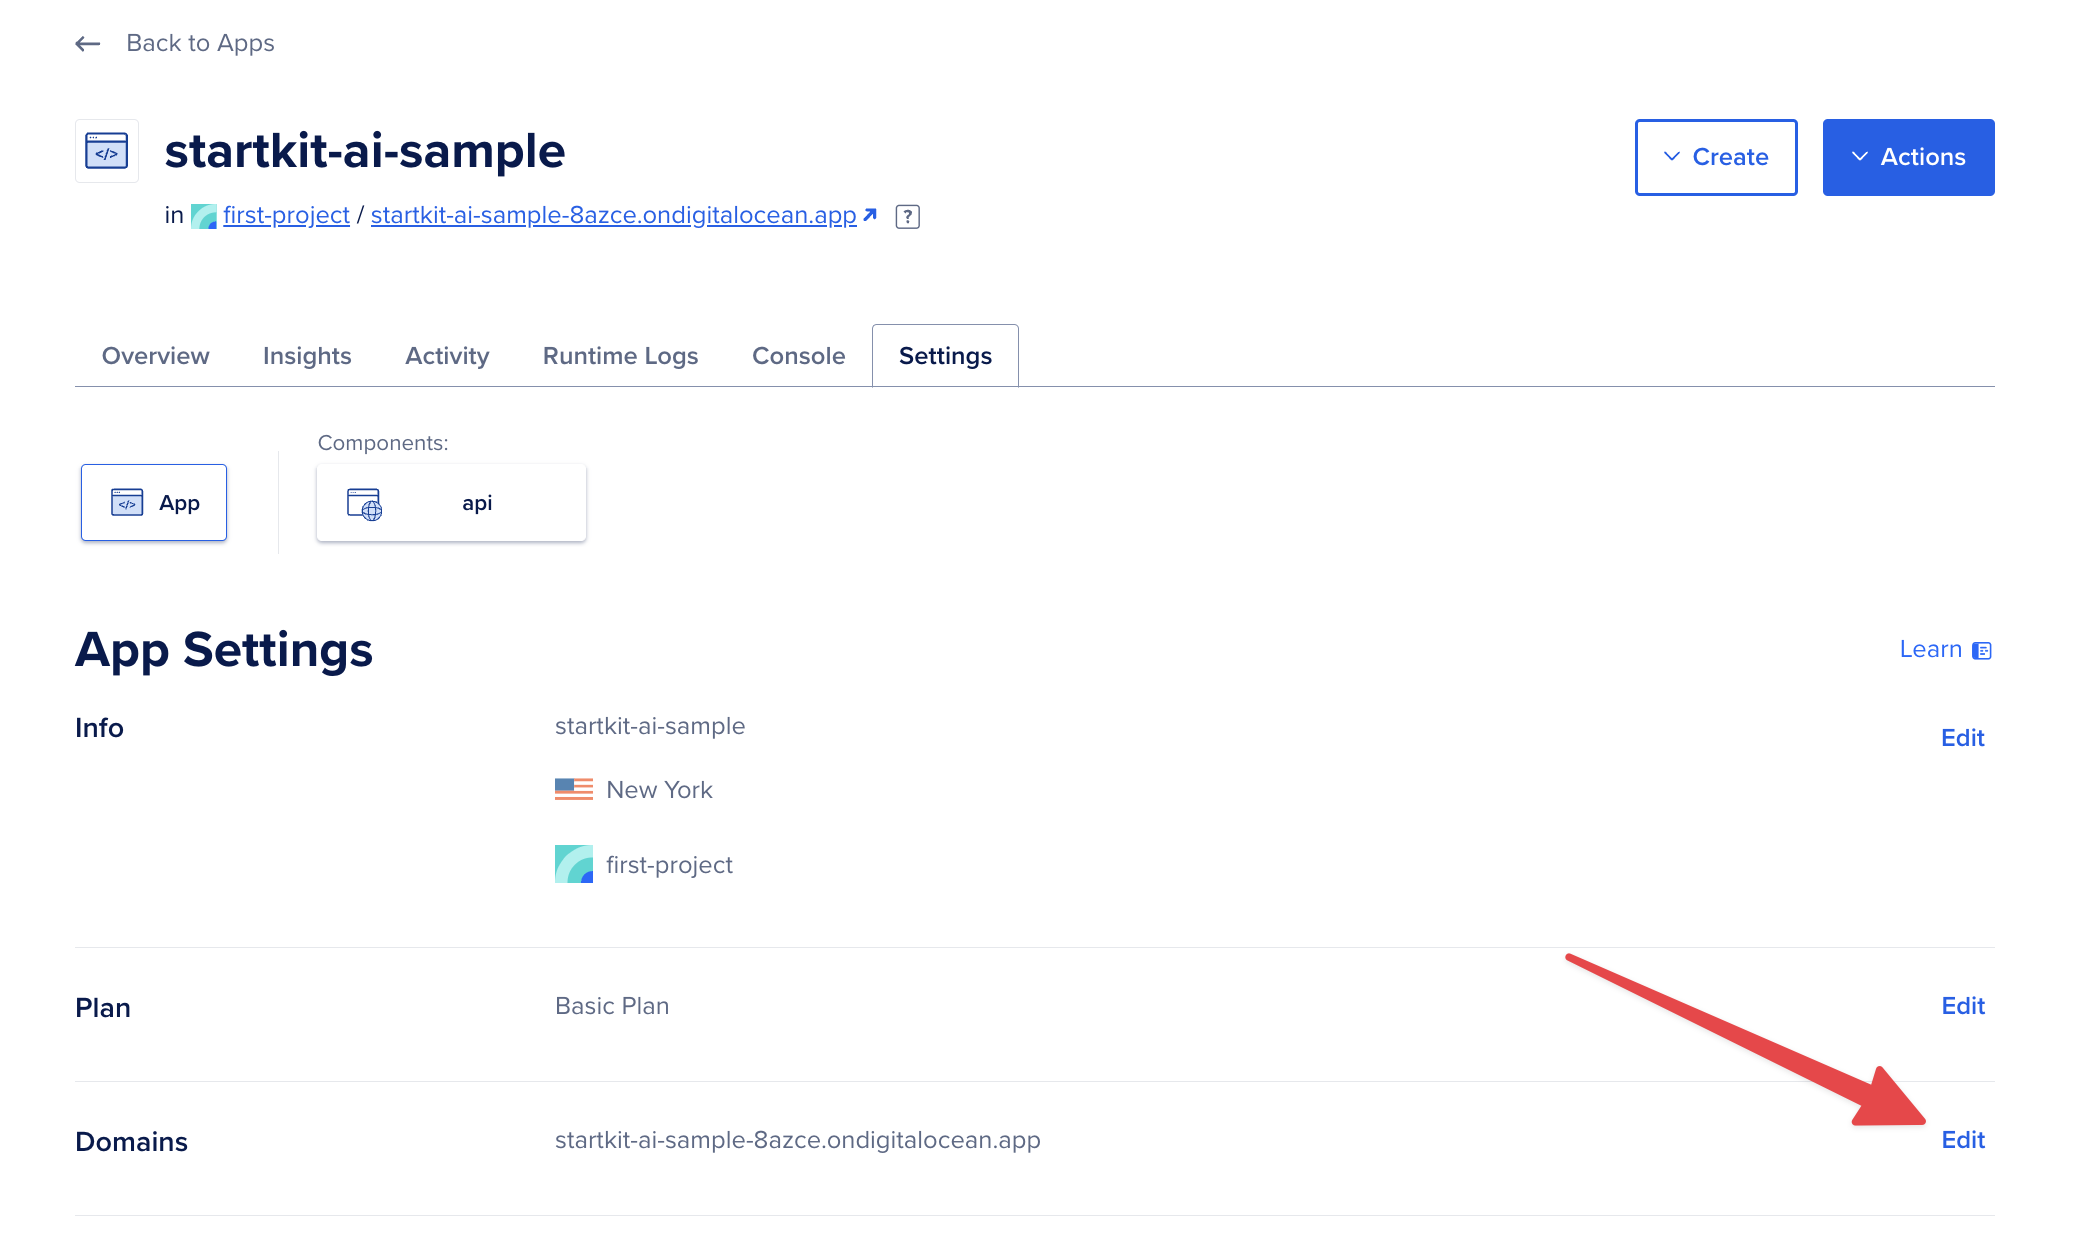
You are given a choice to delegate your DNS management to DigitalOcean or to point to your app by adding a CNAME record to your domain configuration.
Click “Add Domain” and you’re done! 🥳
Customise your app
Now your chatbot is up and running, we can customise it to make it even better!
Modify the prompt
You’ll find all the AI prompts in /config/prompts.
We’re going to give your chatbot a pirate personality and default to a different model.
Open the chat prompt in /config/prompts/chat.yml and paste the following into the system prompt:
system: | You're a chatbot that can reply to messages about a variety of topics. This is how you should respond: - Talk like a pirate sailing the high seasIn models set a different default model (first in the list), e.g. gpt-4o-mini.
If a model is not available the request will fallback to the next one using this order.
models: - gpt-4o-miniMake sure you restart your server (or use nodemon to restart automatically with code changes) and start a new chat at http://localhost:1337.
Your chatbot should now respond with pirate-themed flair! 🏴☠️
Make it yours
Page title, description and other meta properties are defined in /web/index.html so you can go ahead and replace anything that references StartKit.AI with your new app name and details.
You want any images to be absolute URLs such as https://<your-custom-domain>/favicon.png and the rest is up to you!
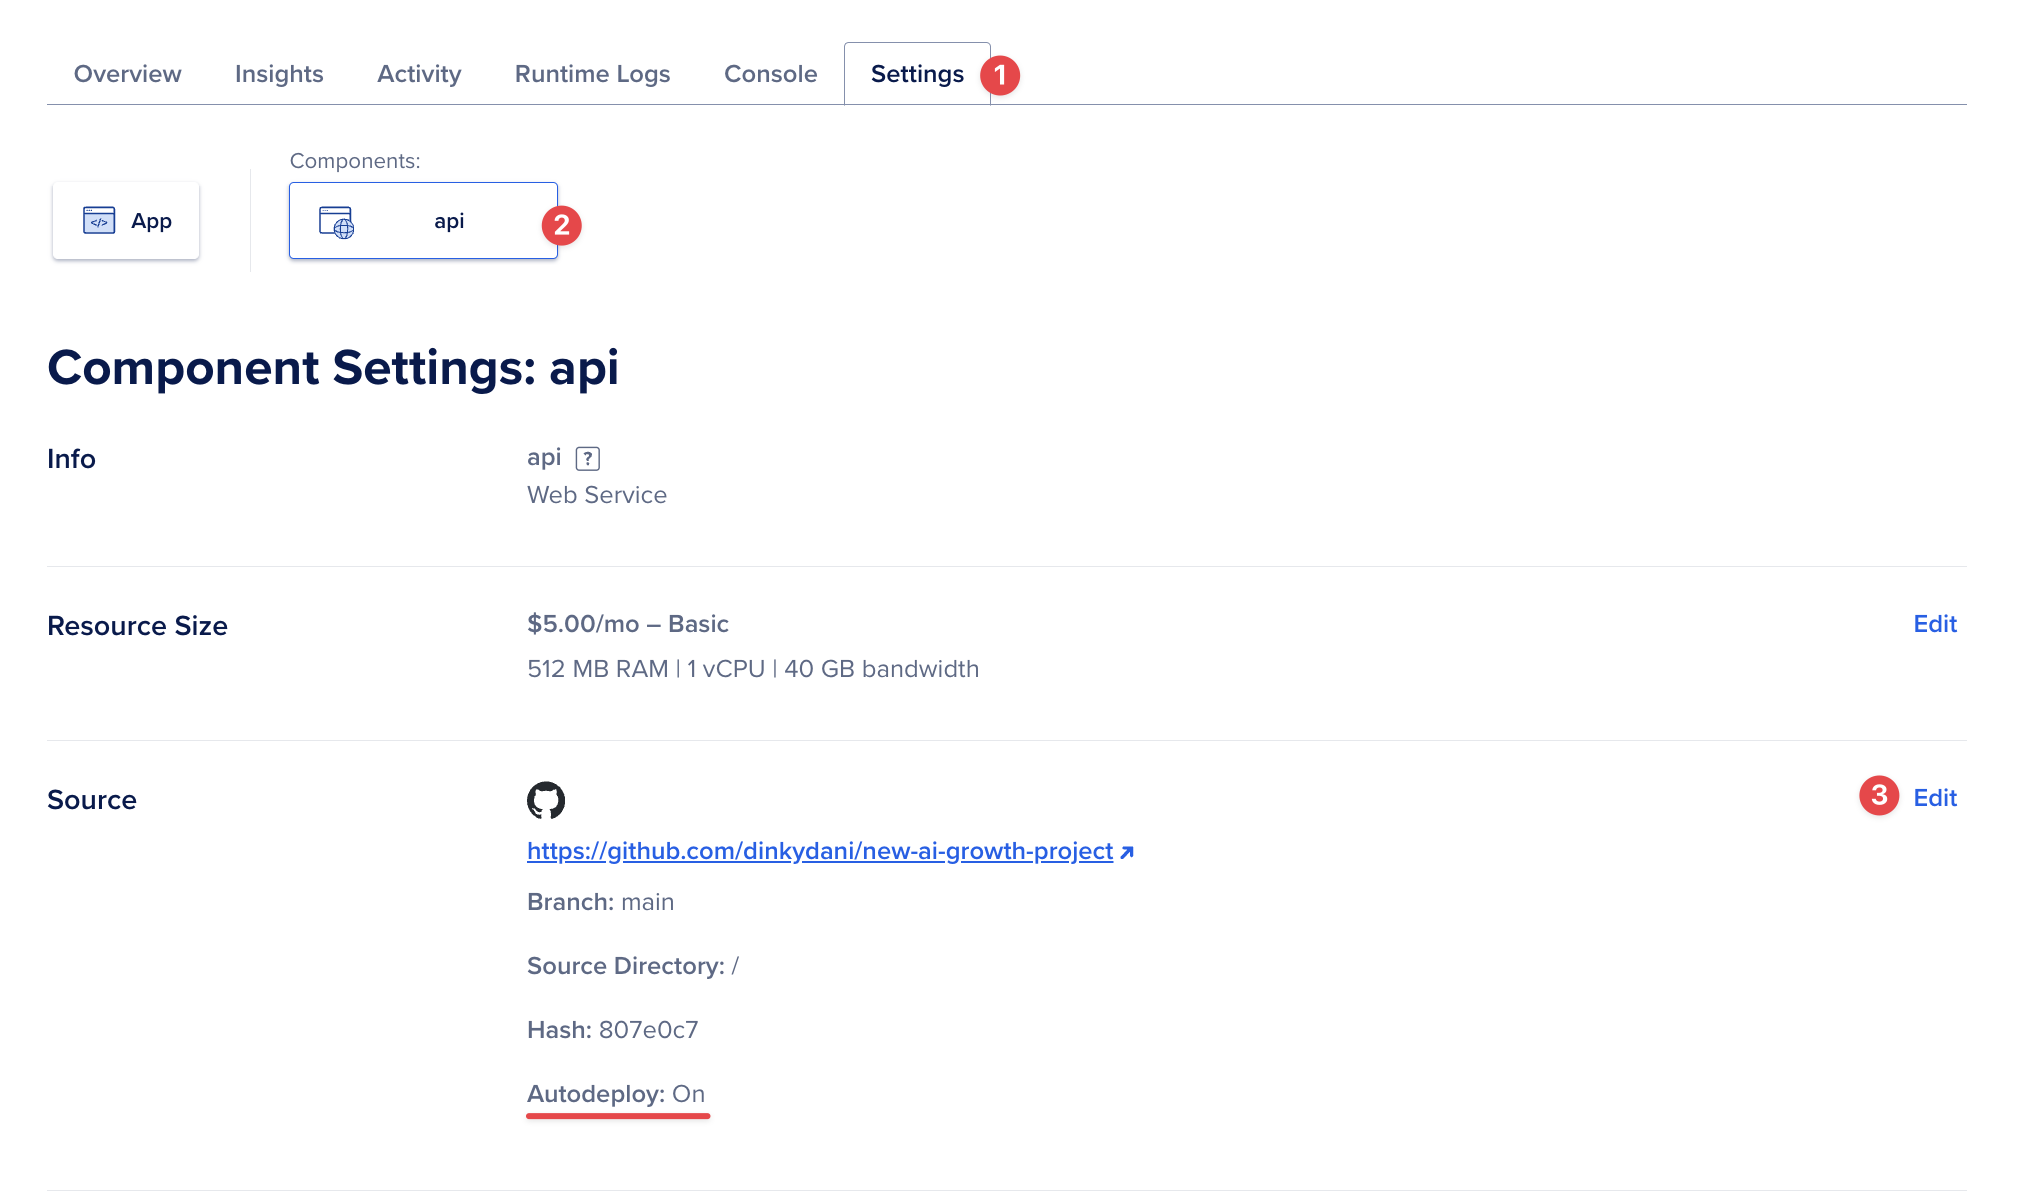
If you don’t want the app to autodeploy wheny ou push you can disable this in the component settings. Click Settings -> Click the api component -> Edit Source settings (see below).
You now have a fully-functional ChatGPT clone (that replies like a cool pirate) deployed and ready to take to the next level! 😁